
Adding screenshot testing with Cypress in your project
Developers are usually concerned about the quality of their code. There are different kinds of tests to avoid breaking code when a new feature is added in a project, however, what can be done to ensure that components don't look different over time?
In this post, you will learn how to use Cypress to capture parts of pages of a website and after that, you will integrate the testing tool in CI to ensure that in the future no one will bring unwanted changes in the project.
My motivation for creating this testing strategy came from work. At Thinkific ↗︎ we have an internal Design System and we added Cypress to avoid surprises when working in CSS/JS files.
By the end of this post we will have PRs with Cypress tests:
Before we start
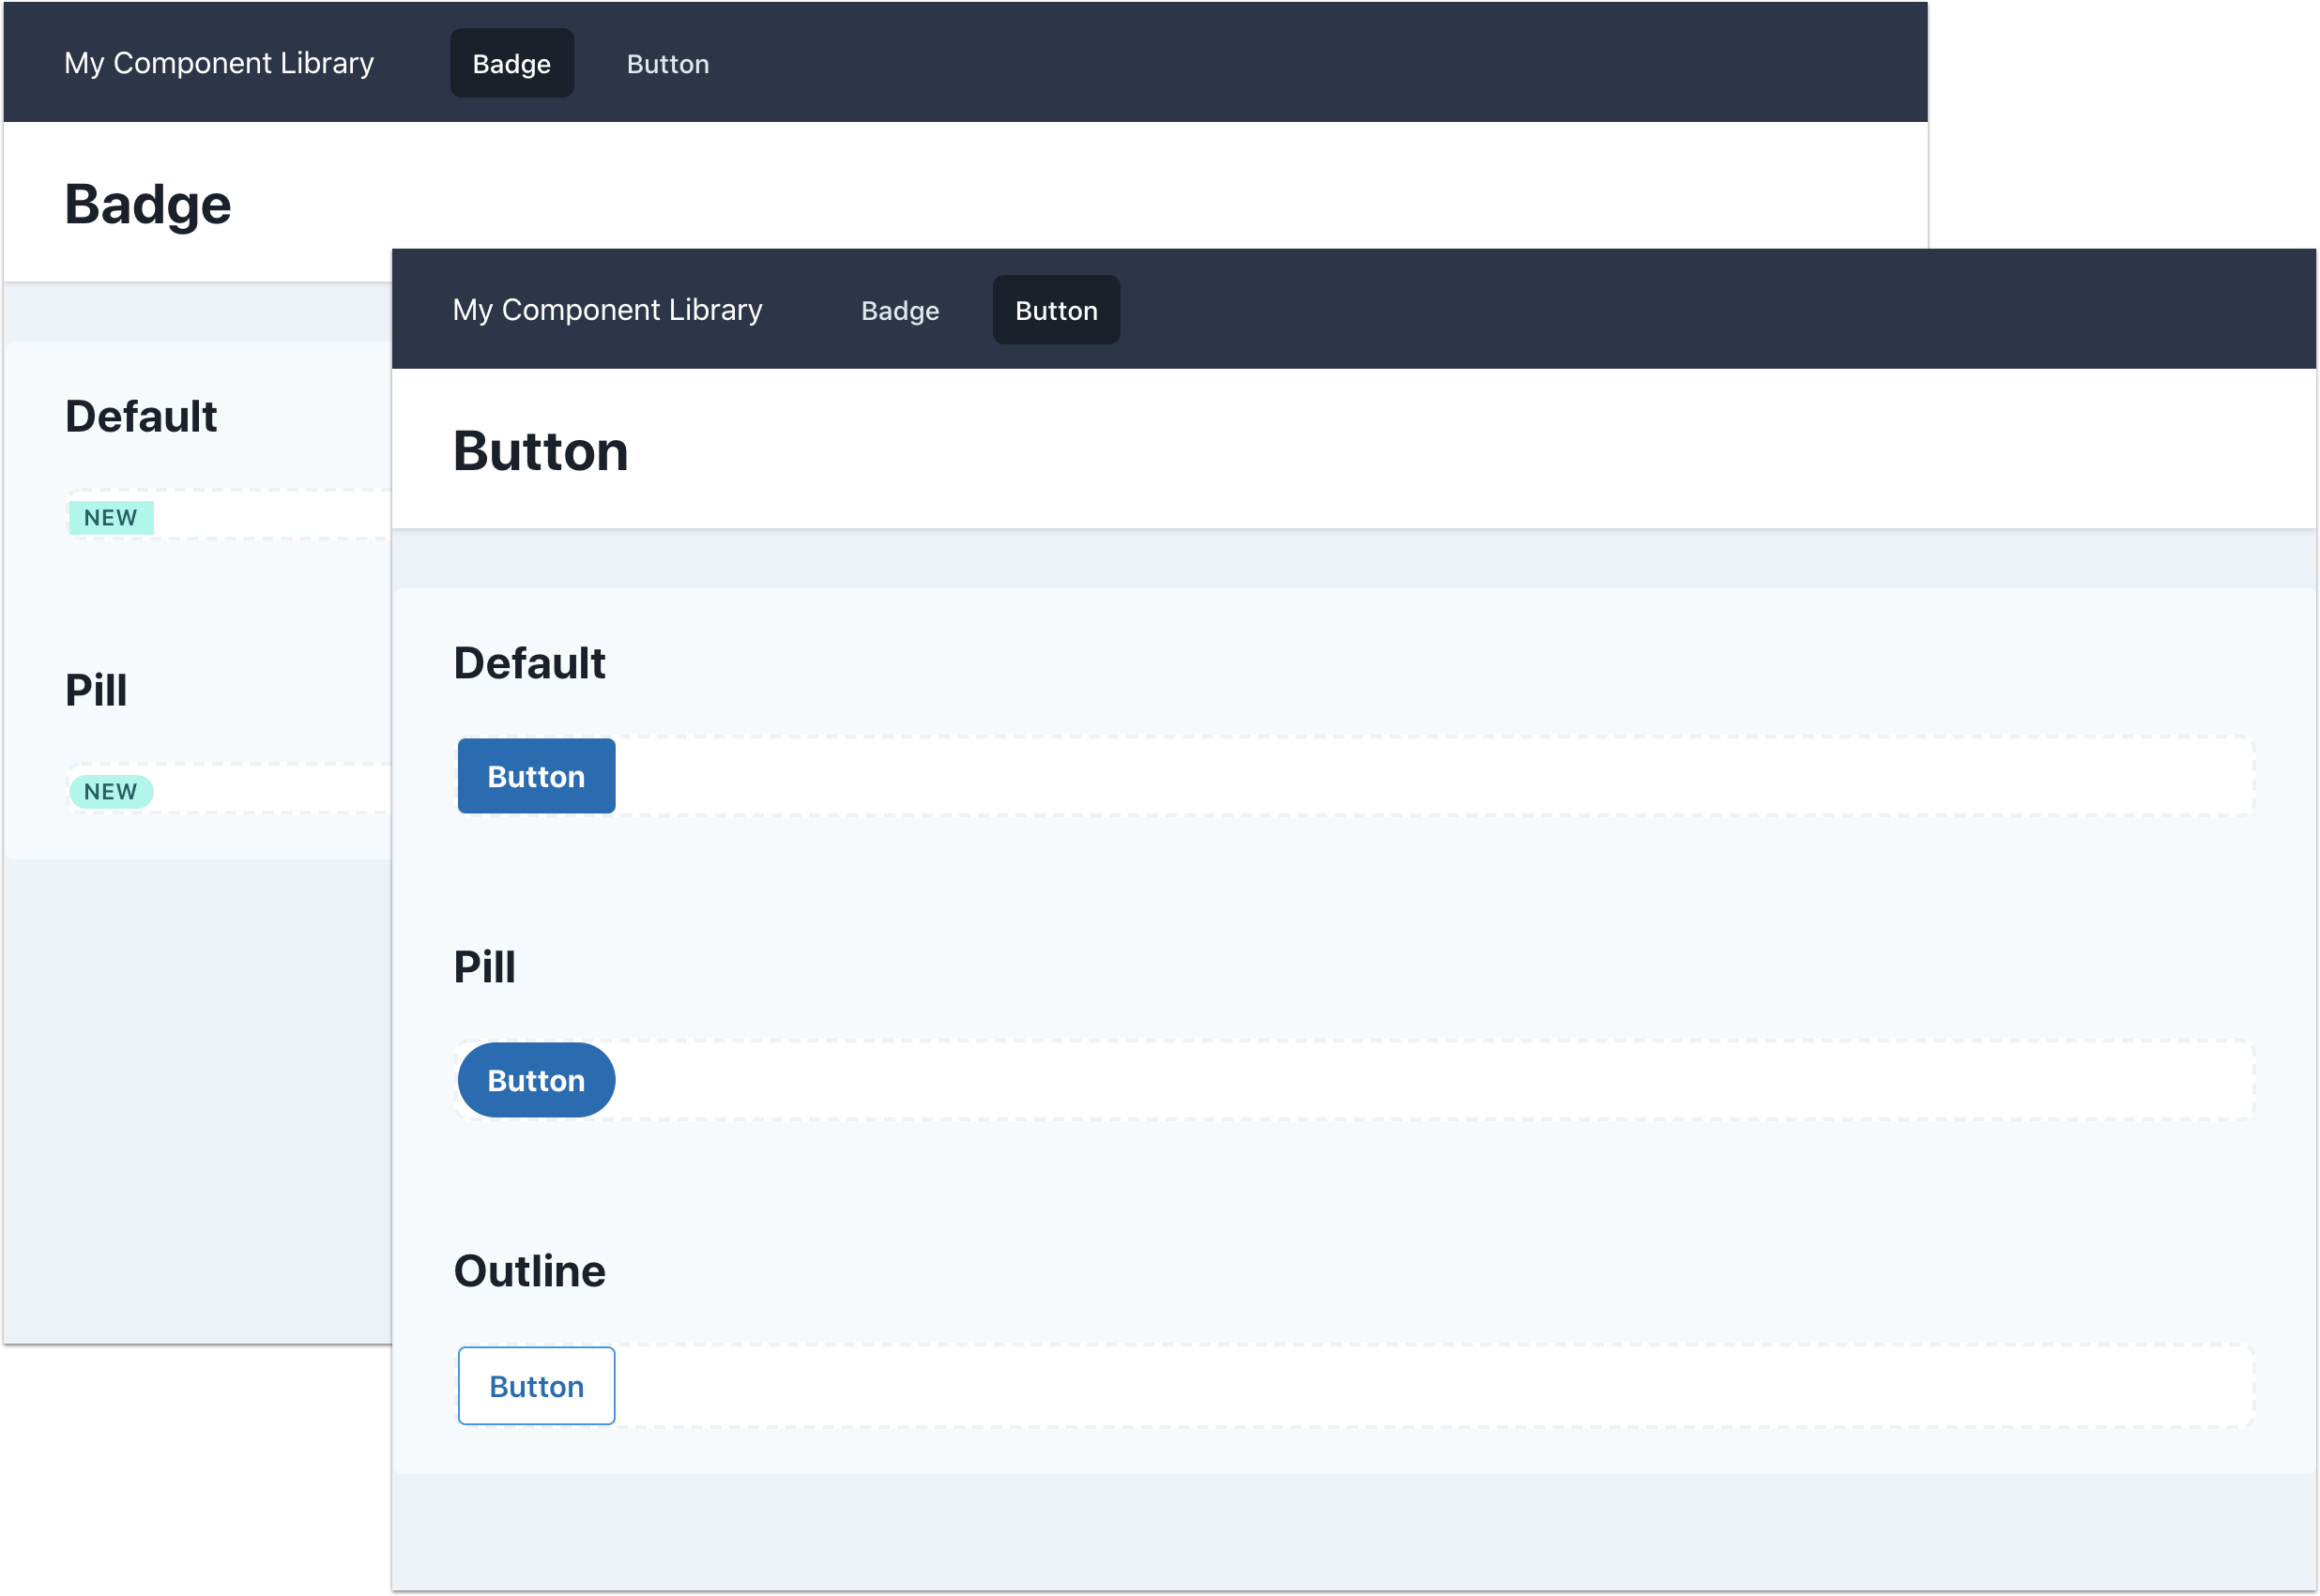
I created a sample website ↗︎ to mimic a Component Library. It is a very simple website created with TailwindCSS and hosted in Vercel and it documents 2 components: badge ↗︎ and button ↗︎.
You can check the source code in GitHub. The website is static and it is inside the public folder. You can see the website locally by running npm run serve and checking in the browser http://localhost:8000.
Adding Cypress and Cypress Image Snapshot
Start by cloning the example repository. Next, create a new branch and install Cypress Image Snapshot, the package responsible for capturing/comparing screenshots.
git checkout -b add-cypress
npm install -D cypress cypress-image-snapshot
After adding the packages, a few extra steps are needed to add Cypress Image Snapshot in Cypress.
Create a cypress/plugins/index.js file with the following content:
const { addMatchImageSnapshotPlugin } = require('cypress-image-snapshot/plugin');

module.exports = (on, config) => {
  addMatchImageSnapshotPlugin(on, config);
};
Next, create a cypress/support/index.js file containing:
import { addMatchImageSnapshotCommand } from 'cypress-image-snapshot/command';

addMatchImageSnapshotCommand();
Creating the screenshot test
Time to create the screenshot test. Here is the plan:
- Cypress will visit each page (badge and button) of the project.
- Cypress will take a screenshot of each example in the page. The Badge page has 2 examples (Default and Pill), while the Button page has 3 examples (Default, Pill and Outline). All these examples are inside an
<div>element with acypress-wrapper. This class was added with the only intention to identify what needs to be tested.
The first step is creating Cypress configuration file (cypress.json):
{
  "baseUrl": "http://localhost:8000/",
  "video": false
}
The baseUrl is the website running locally. As I mentioned before, npm run serve will serve the content of the public folder. The second option, video disables Cypress video recording, which won't be used in the project.
Time to create the test. In cypress/integration/screenshot.spec.js, add:
const routes = ['badge.html', 'button.html'];

describe('Component screenshot', () => {
  routes.forEach((route) => {
    const componentName = route.replace('.html', '');
    const testName = `${componentName} should match previous screenshot`;

    it(testName, () => {
      cy.visit(route);

      cy.get('.cypress-wrapper').each((element, index) => {
        const name = `${componentName}-${index}`;

        cy.wrap(element).matchImageSnapshot(name);
      });
    });
  });
});
In the code above, I am creating dynamically tests based in the routes array. The test will create one image per .cypress-wrapper element that the page has.
Last, let's create inside the package.json the command to trigger the tests:
{
  "test": "cypress"
}
From here, there are 2 options: run Cypress in headless mode with npm run cypress run or use the Cypress Test Runner with npm run cypress open.
Headless option
Using npm run cypress run, the output should be similar to the next image:
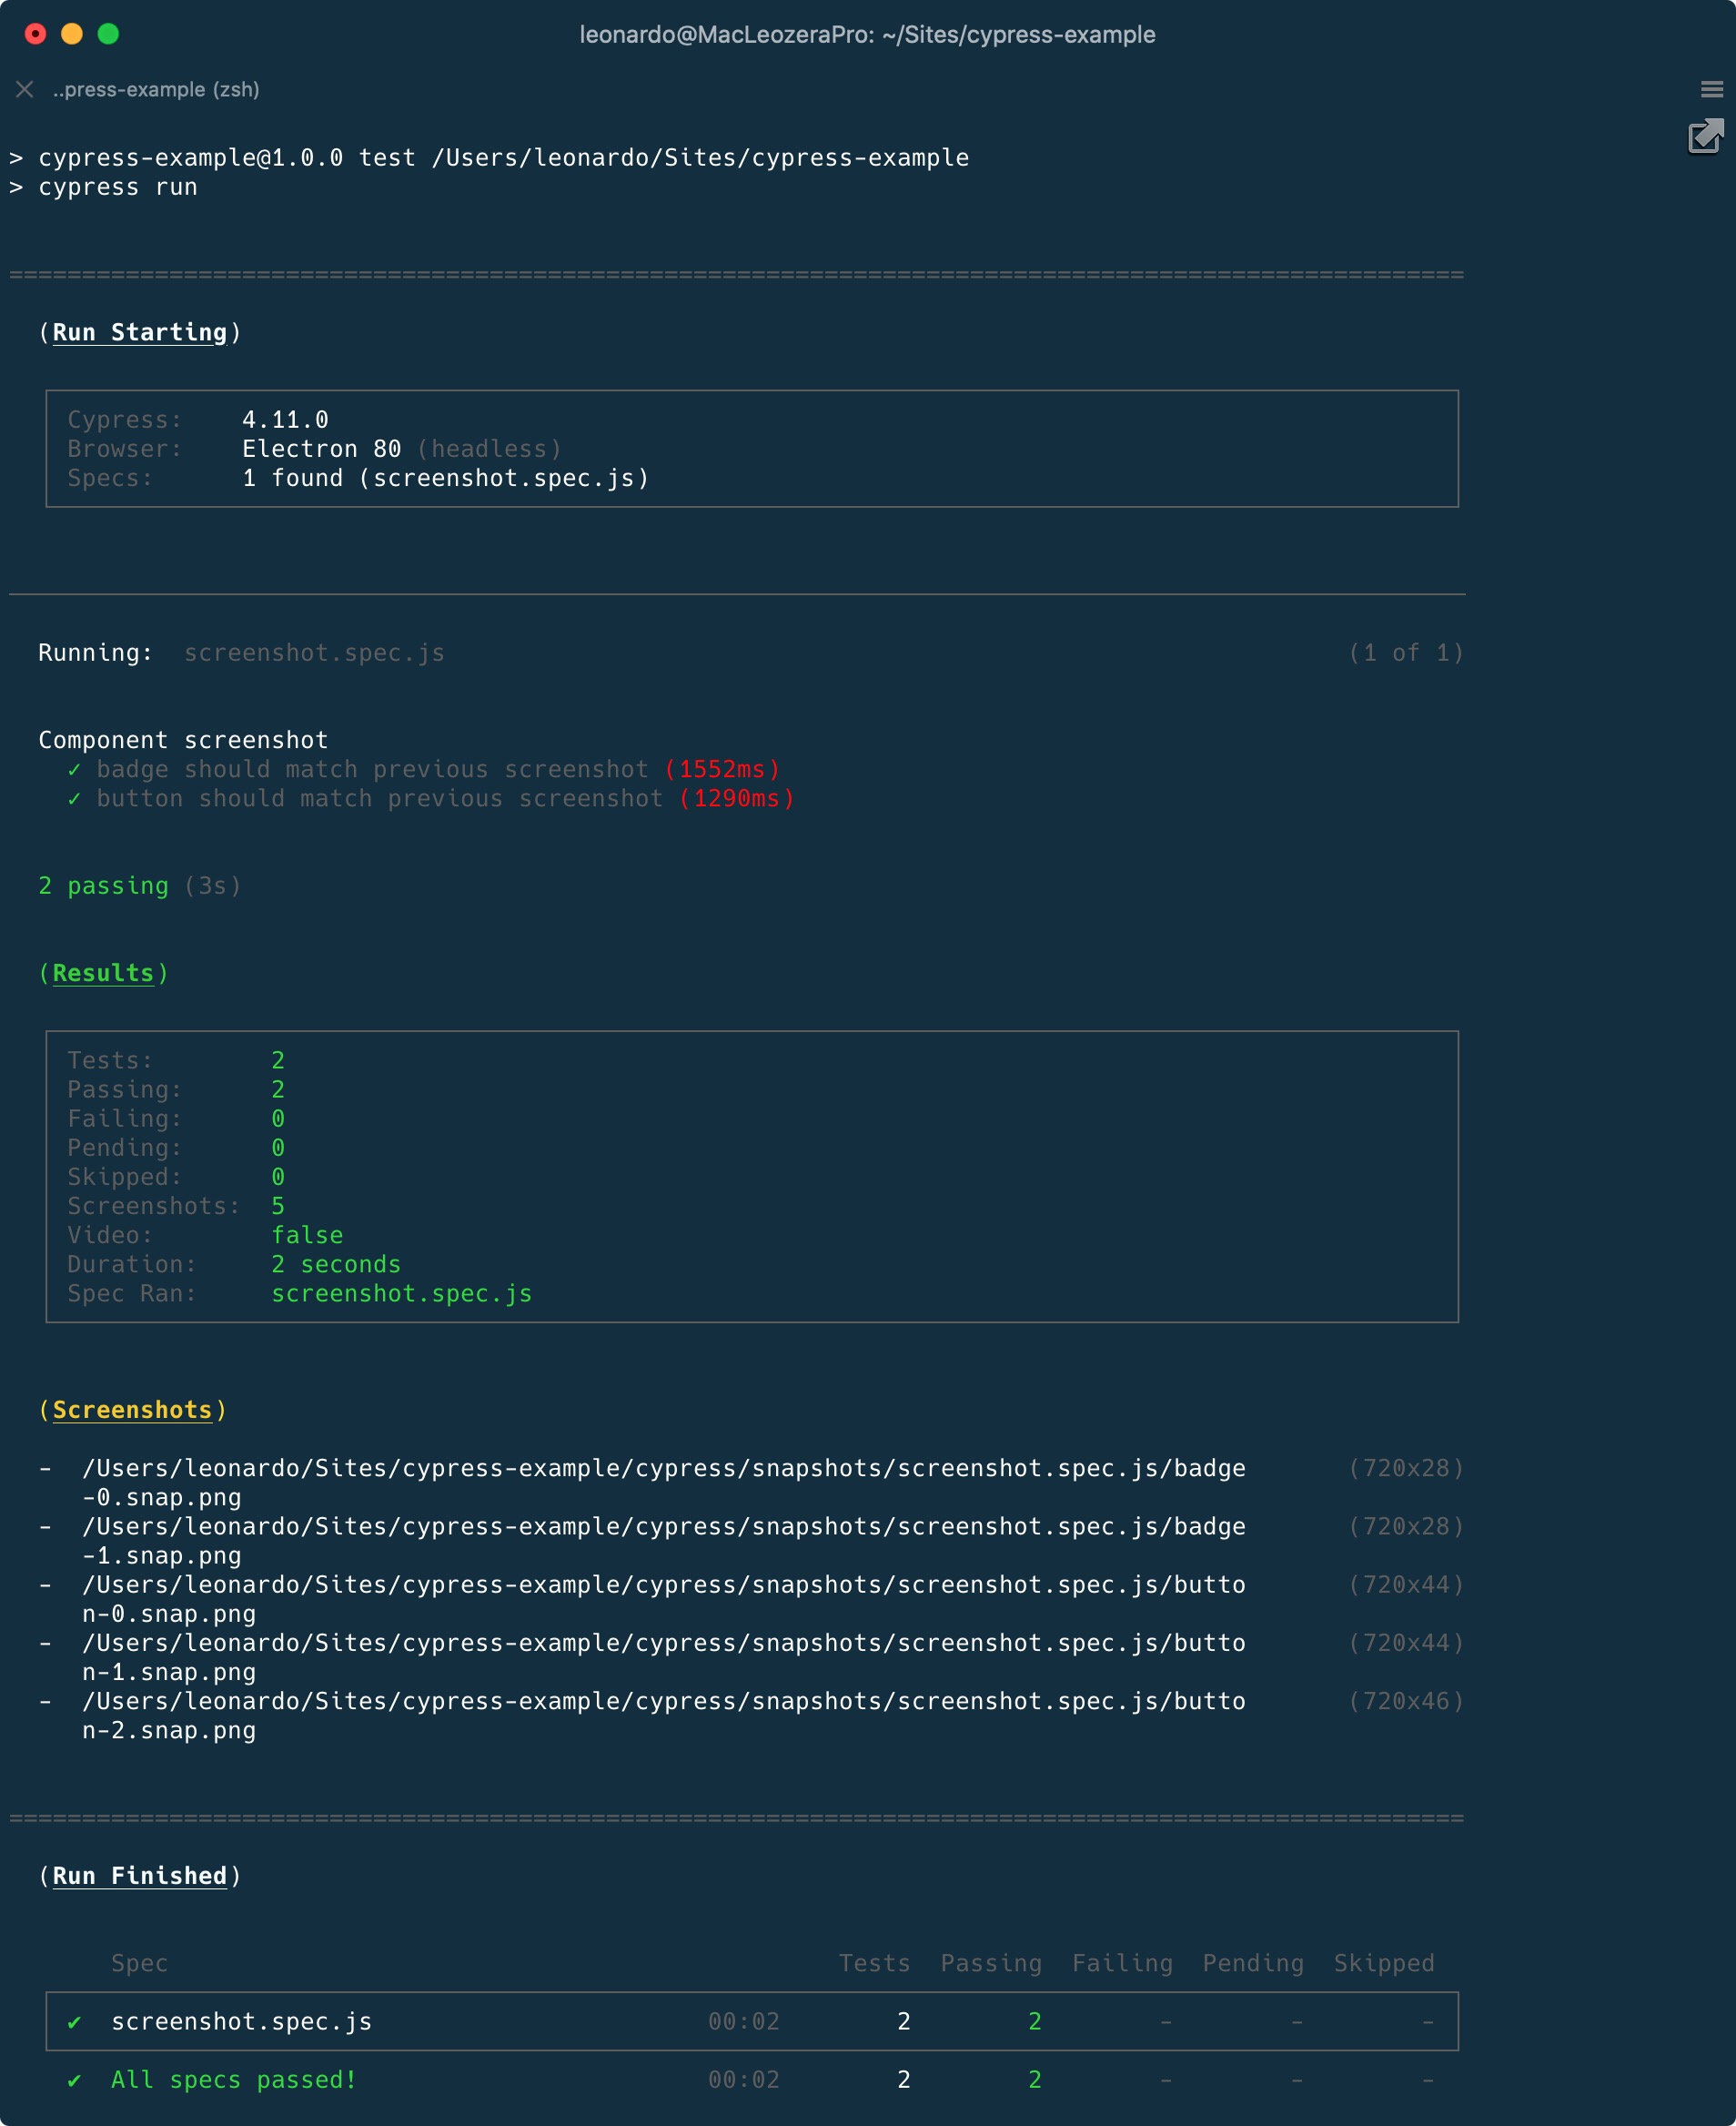
The tests will pass and 5 images will be created under /snapshots/screenshot.spec.js folder.
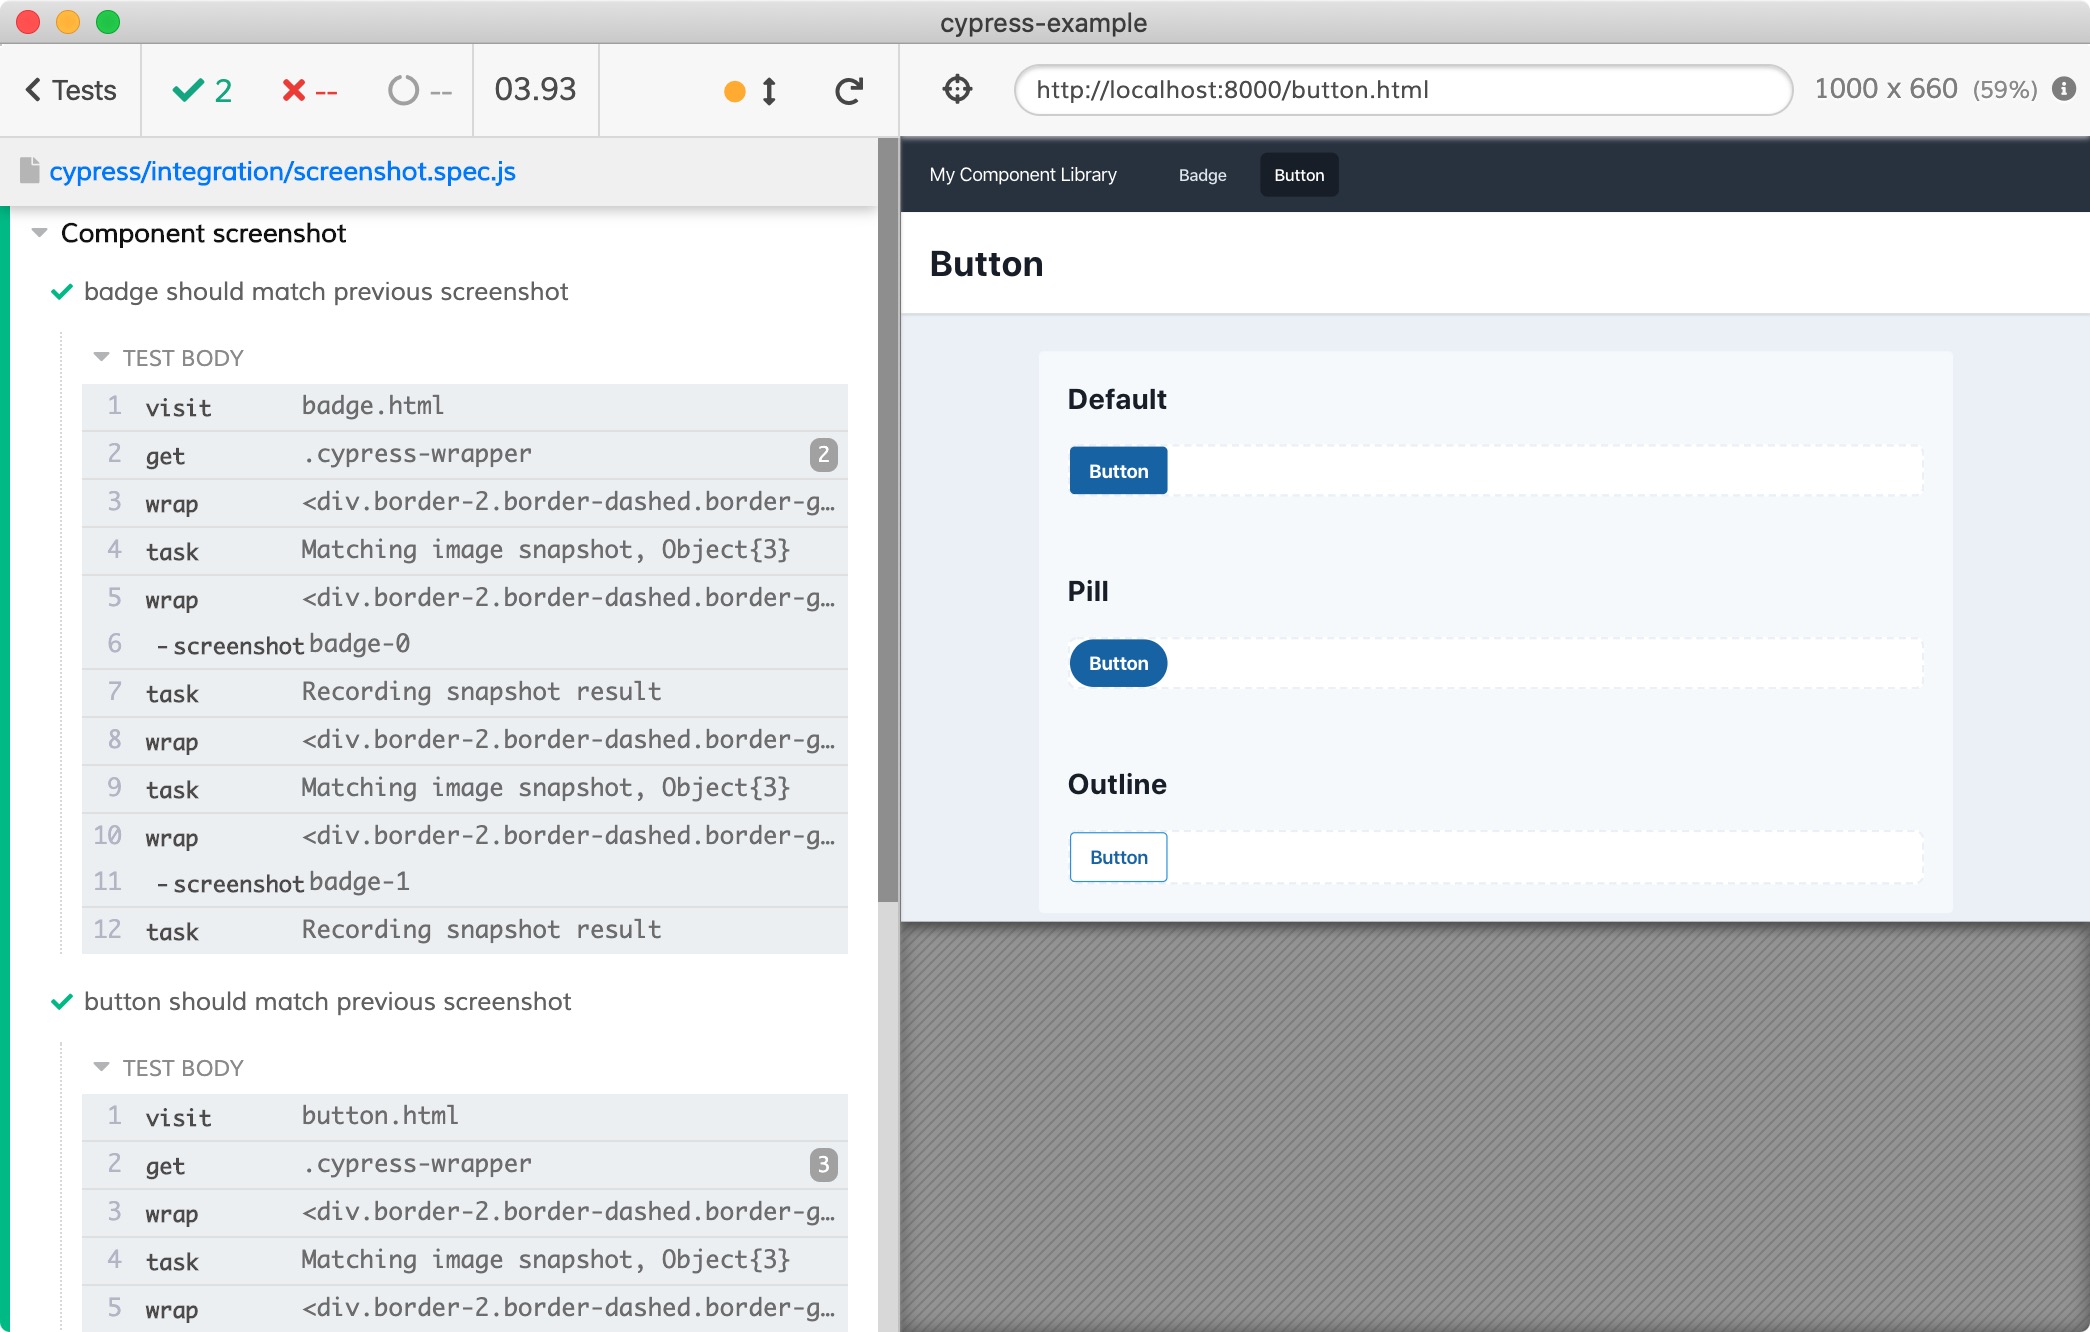
Test Runner option
Using npm run cypress open, Cypress Test Runner will be opened and you can follow step by step the tests.
Our first milestone is done, let's merge this branch to master. If you want to see the work done so far, jump in my Pull Request.
Using Cypress inside Docker
If you run the test above alternating between headless and Test Runner, you may notice that screenshot will vary. Using the Test Runner with a retina display computer, you may get retina images (2x), while the headless mode doesn't give you high-quality screenshots.
Also, it is important to say the screenshots may vary according to the Operational System. Linux and Windows, for instance, have apps with visible scrollbars, while macOS hides the scrollbar. If the content captured in the screenshot doesn't fit a component, you may or may not have a scrollbar. If your project relies on OS default fonts, screenshots will also be different according to the environment.
In order to avoid these inconsistencies, tests will run inside Docker so the developer computer won't affect in the screenshots captures.
Let's start by creating a new branch:
git checkout -b add-dockerCypress offers different Docker images - you can check details in their documentation ↗︎ and their blog ↗︎. For this example, I will use the cypress/included image, which includes Electron and it is ready to be used.
Two changes will be needed: change the baseUrl in the cypress.json file:
{
  "baseUrl": "http://host.docker.internal:8000/",
}
and the test command in the package.json file:
{
  "test": "docker run -it -e CYPRESS_updateSnapshots=$CYPRESS_updateSnapshots --ipc=host -v $PWD:/e2e -w /e2e cypress/included:4.11.0"
}
Running npm run test will bring us a problem:
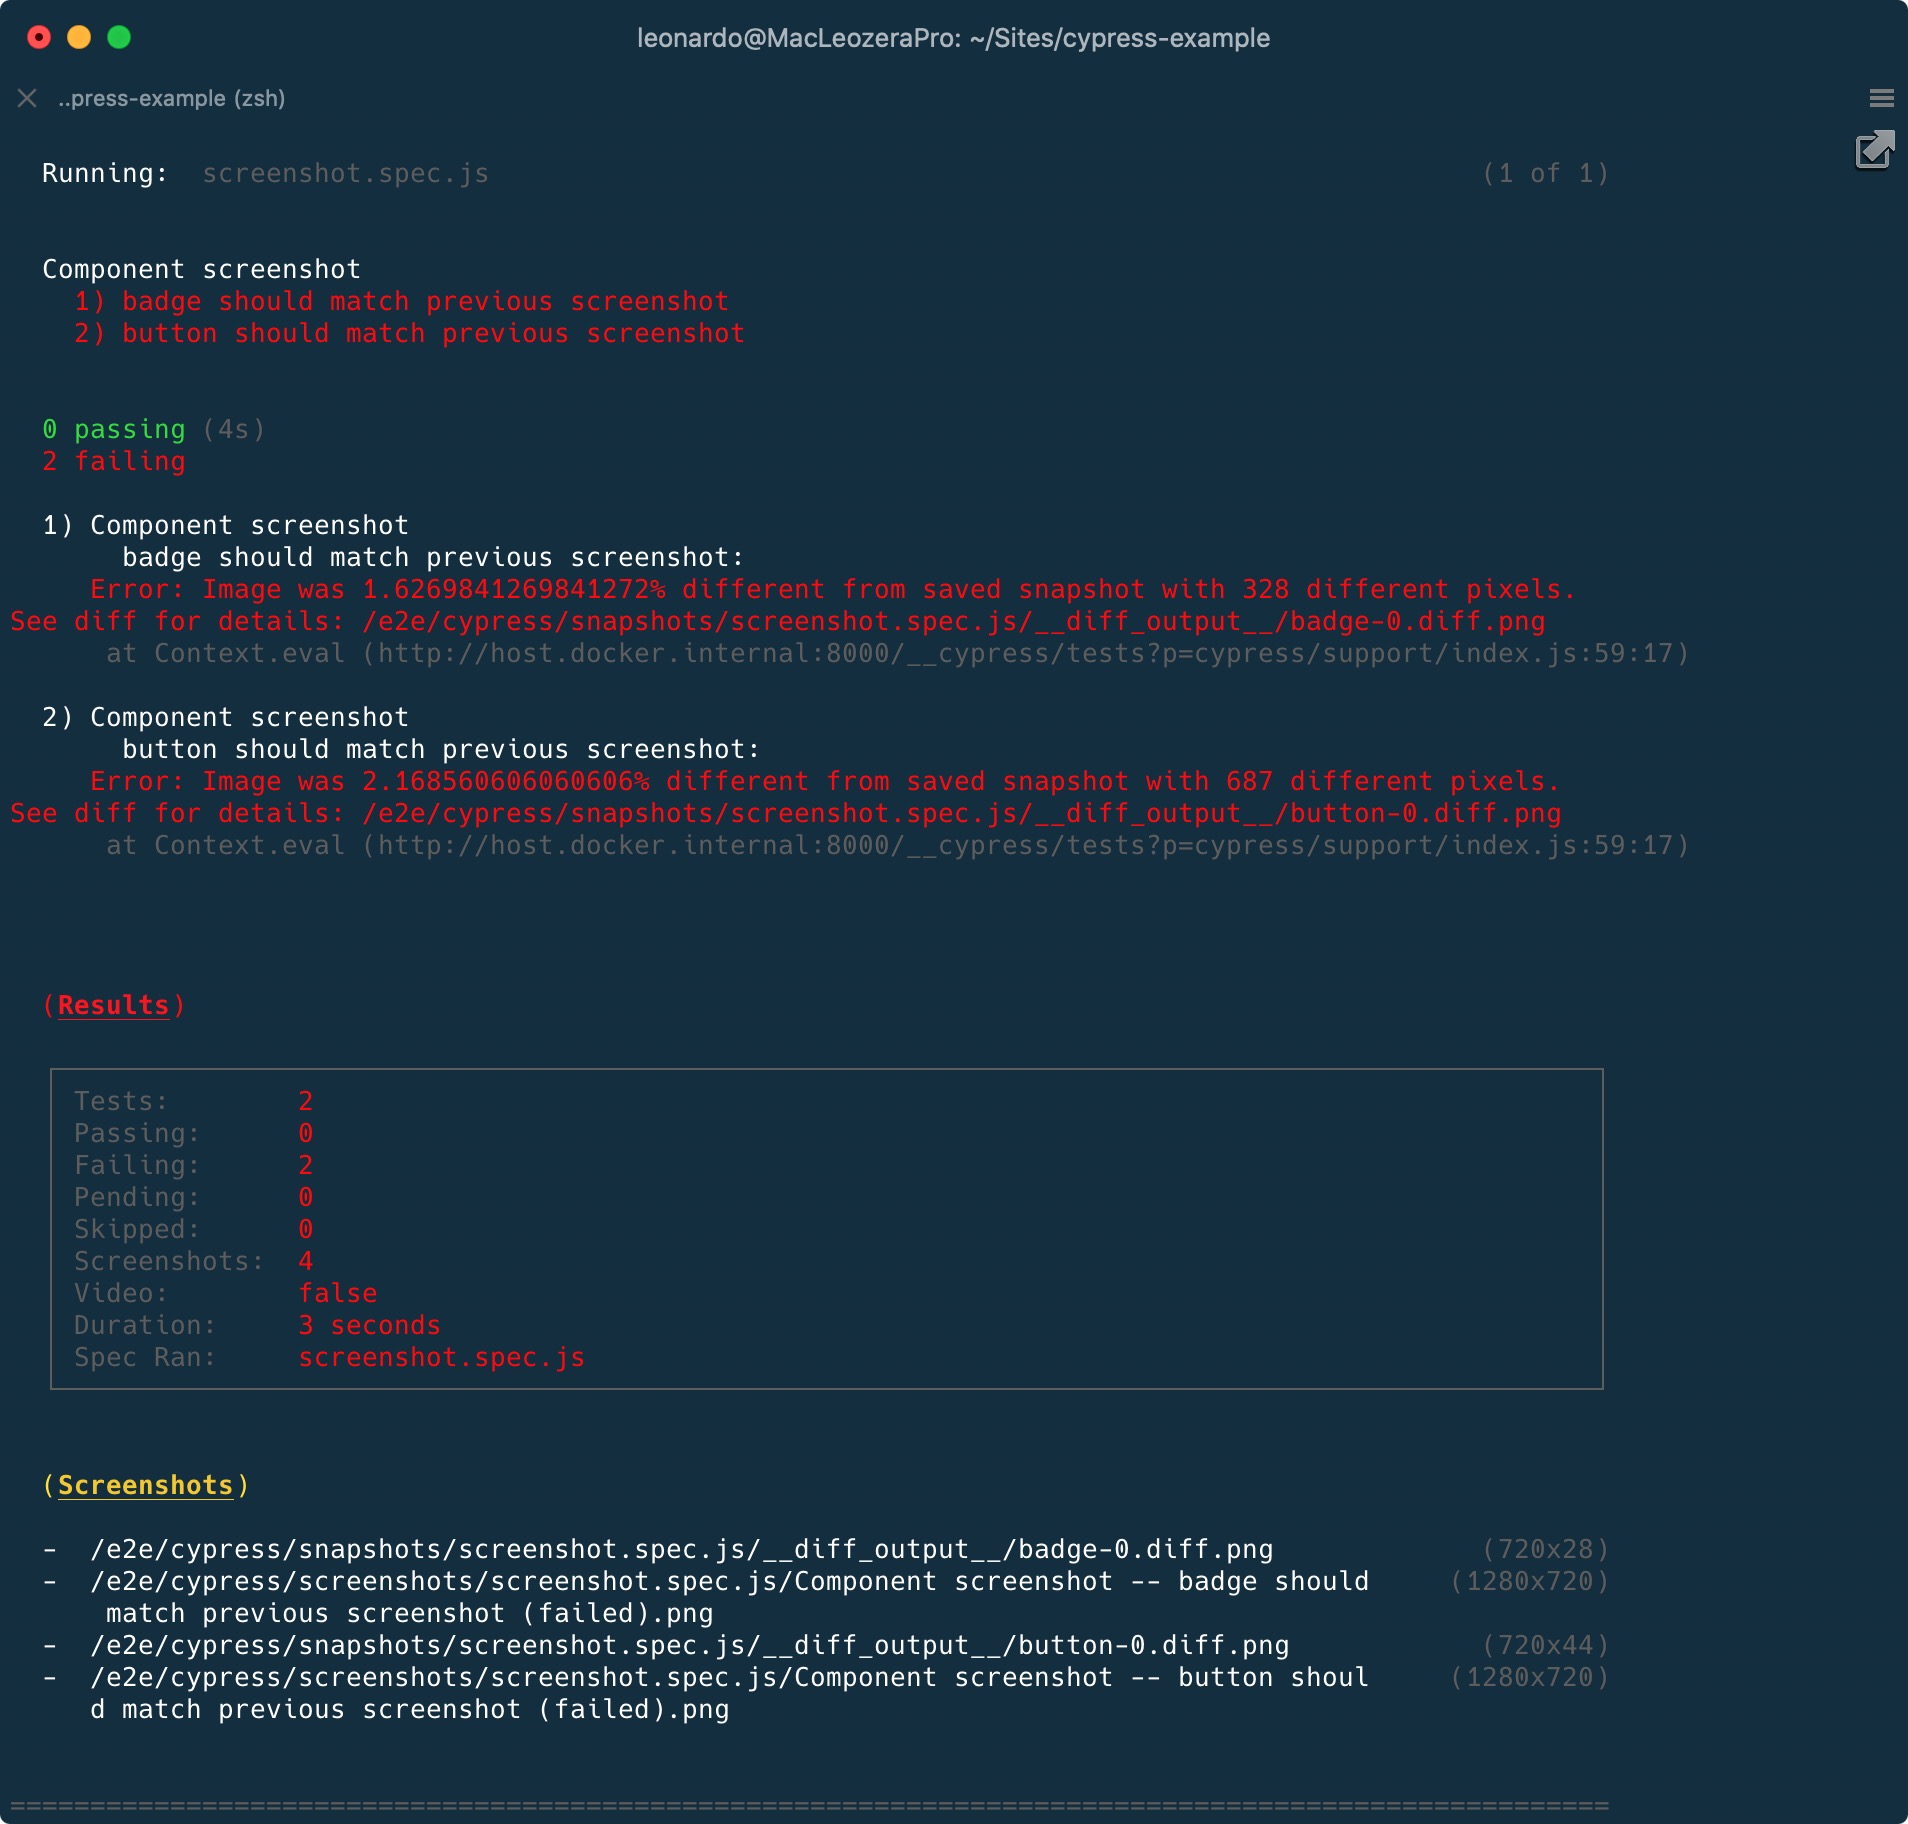
The images are slightly different but why? Let's see what is inside the __diff_output__ folder:

As I mentioned earlier, typography inconsistencies! The Button component uses the OS default font. Since Docker is running inside Linux, the rendered font won't be the same that I have installed on macOS.
Since now we moved to Docker, these screenshots are outdated. Time to update the snapshots:
CYPRESS_updateSnapshots=true npm run testPlease notice that I am prefixing the test command with the environment variable CYPRESS_updateSnapshots.
The second milestone is done. In case you need help, check my pull request.
Let's merge this branch and move forward.
Adding CI
Our next step is adding the tests in CI. There are different CI solutions in the market but for this tutorial, I will use Semaphore. I am not affiliated to them and I use their product at work, so it was for me a natural choice. The configuration is straightforward and it can be adapted to other solutions like CircleCI or Github Actions.
Before we create our Semaphore configuration file, let's prepare our project to run in CI.
The first step is installing start-server-and-test. As the package name says, it will start a server, waits for URL, then runs a test command:
npm install -D start-server-and-testSecond, edit the package.json file:
{
  "test": "docker run -it -e CYPRESS_baseUrl=$CYPRESS_baseUrl -e CYPRESS_updateSnapshots=$CYPRESS_updateSnapshots --ipc=host -v $PWD:/e2e -w /e2e cypress/included:4.11.0",
  "test:ci": "start-server-and-test serve http://localhost:8000 test"
}
In the test script, we are adding the CYPRESS_baseUrl environment variable. This will allow us to change the base URL used by Cypress dynamically. Also, we are adding the test:ci script, which will run the package we just installed.
We are ready for Semaphore. Create the .semaphore/semaphore.yml file with the following content:
version: v1.0
name: Cypress example
agent:
  machine:
    type: e1-standard-2
    os_image: ubuntu1804
blocks:
  - name: Build Dependencies
    dependencies: []
    task:
      jobs:
        - name: NPM
          commands:
            - sem-version node 12
            - checkout
            - npm install
  - name: Tests
    dependencies: ['Build Dependencies']
    task:
      prologue:
        commands:
          - sem-version node 12
          - checkout
      jobs:
        - name: Cypress
          commands:
            - export CYPRESS_baseUrl="http://$(ip route | grep -E '(default|docker0)' | grep -Eo '([0-9]+\.){3}[0-9]+' | tail -1):8000"
            - npm run test:ci
Breaking the configuration in details:
- The lines 1-6 defines which kind of instance we will use in their environment;
- The lines 8 and 16 create 2 blocks: the first block, "Build Dependencies" will run
npm install, downloading the dependencies we need. The second block, "Tests" will run Cypress, with a few differences. - In line 27, we are dynamically setting the
CYPRESS_baseUrlenvironment variable based in the IP Docker is using at the moment. This will replacehttp://host.docker.internal:8000/, which may not work in all environments. - In line 28, we finally run the test using
start-server-and-test: once the server is ready for connections, Cypress will run the test suite.
Another milestone is done, time to merge our branch! You can check the Pull request that contains all the files from this section and check the build inside Semaphore ↗︎.
Recording the tests in cypress.io
Reading the output of tests in CI is not very friendly. In this step, we will integrate our project with cypress.io ↗︎.
The following steps are based on Cypress documentation ↗︎.
Let's start by getting a project ID and a record key. In the terminal, create a new branch and run:
git checkout -b add-cypress-recording
CYPRESS_baseUrl=http://localhost:8000 ./node_modules/.bin/cypress open
Earlier I have mentioned we would be using Cypress inside Docker but here we are opening Cypress locally since this is the only way to integrate with the website dashboard.
Inside Cypress, let's go the Runs tab, click in "Set up project to record", choose a name and visibility. We will get a projectId that is automatically added in the cypress.json file and a private record key. Here is a video of the steps:
In Semaphore, I added the record key as an environment variable called CYPRESS_recordKey. Next let's update our test script to use the variable:
{
"test:ci": "start-server-and-test 'serve' 8000 'npm run test -- run --record --key $CYPRESS_recordKey'"
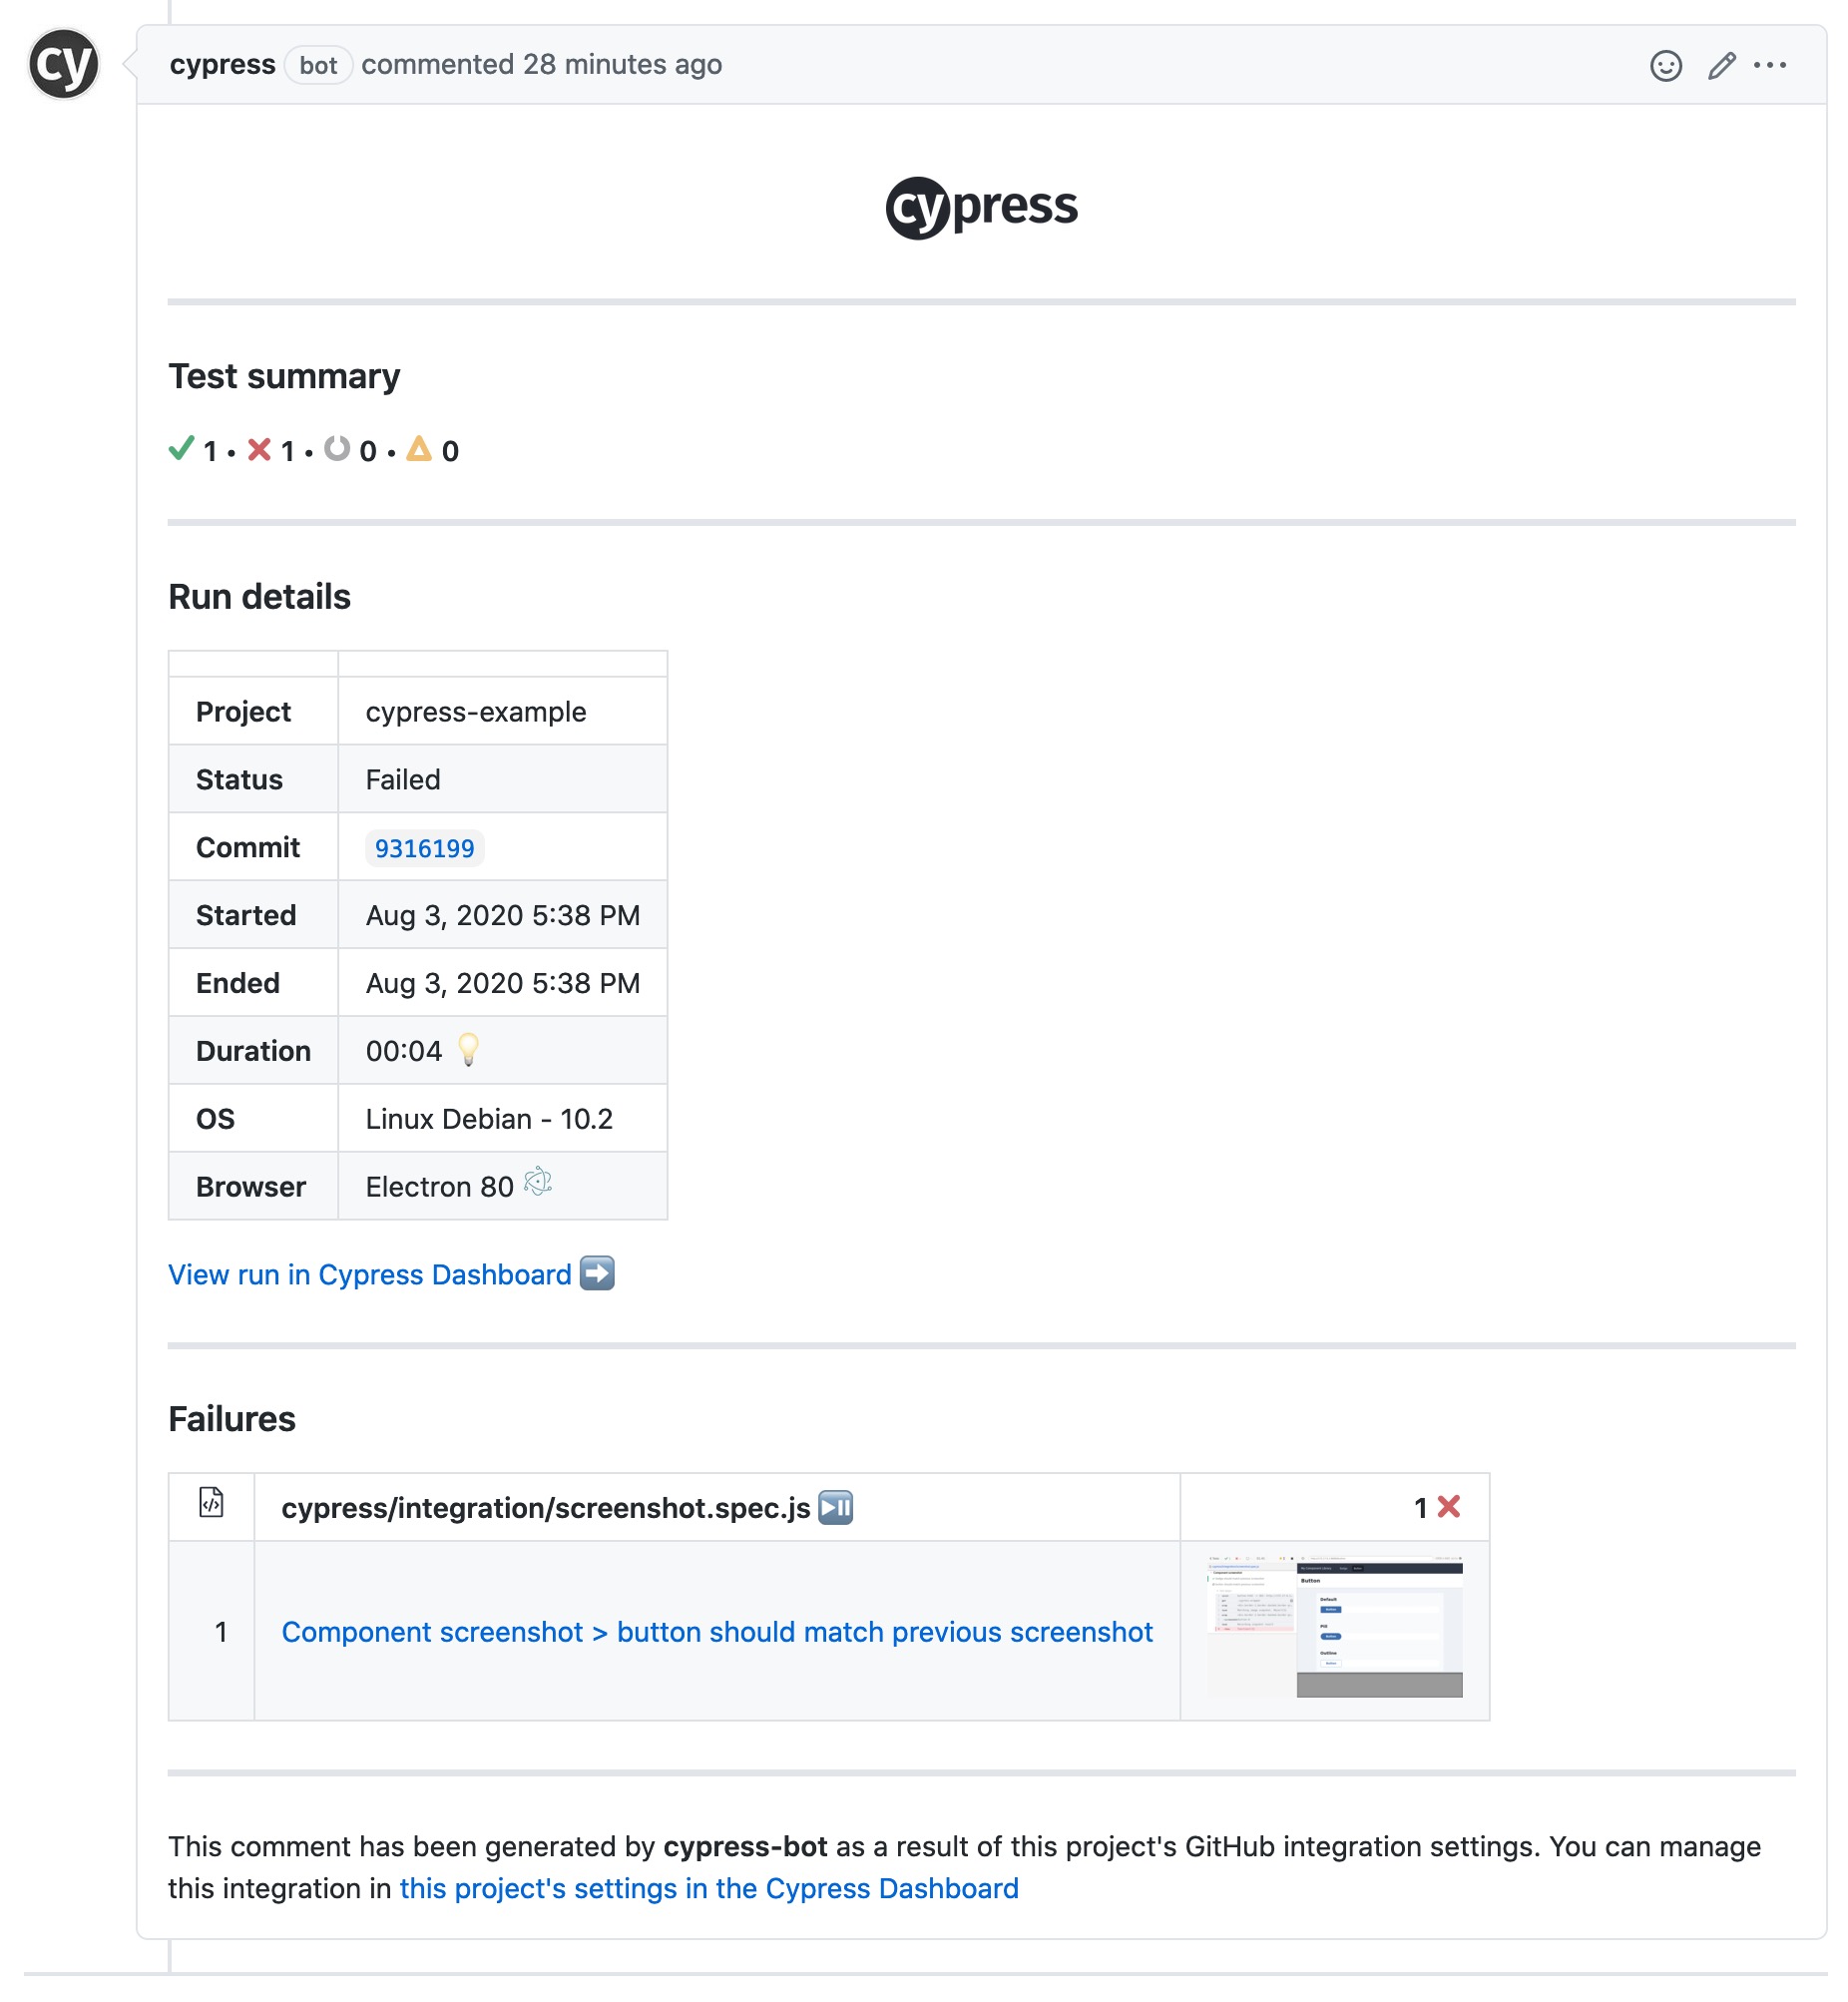
}That is pretty much all that needs to be done. In the Pull request we can see the cypress.io integration in the comments. There is even a deep link that takes us to their dashboard and shows all the screenshots. Check the video below:
Time to merge our work and that is the end of our integration.
Testing in real life
Imagine we are working on a change that affects the padding of the buttons: time to test if Cypress will capture the difference.
In the example website, let's double the horizontal padding from 16px to 32px. This change is quite simple since we are using Tailwind CSS: px-4 gets replaced by px-8. Here is Pull request.
As we could expect, Cypress captured that the button doesn't match the screenshots. Visiting the page, we can check the screenshot of the broken test:
The diff file shows the original screenshot on the left, the current result on the right and they are combined in the middle. We also have the option to download the image so we can see the issue better:

If this is not an issue, update the screenshots:
CYPRESS_updateSnapshots=true npm run testThe end
That's it for today. I hope you have learned how Cypress can be useful to ensure no one is adding unexpected changes in a project.