Automating accessibility tests with Cypress
In my previous post, I covered how to add screenshot testing in Cypress to ensure components unintentionally change over time. Now, I will share how to automate accessibility tests with Cypress.
Why should we care about accessibility?
Short answer: because it is the right thing to do.
Long answer: an accessible web can help people with disabilities improve their lives. There are different kinds of disabilities, including auditory, cognitive, neurological, physical, speech and visual and our goal as product creators, engineers, designers is creating experiences that can include all people.
It is also important to mention that web accessibility also benefits people without disabilities, for example, someone changing abilities due to ageing or people with slow Internet connections or using devices with small screens. Last not least, disability can also be temporary, for example, someone with a broken arm can't type and use a mouse at the same time.
If you want to educate yourself about the topic, I can recommend the W3C Web Accessibility Initiative (W3C WAI) ↗︎ and The A11Y Project ↗︎.
Accessibility testing techniques
There are different ways to test if your website/app is accessible. The W3C WAI has a list of 140+ tools ↗︎ to help you determine if your website/app meets accessibility guidelines. You can also add in your strategy:
- Real users testing: companies like Fable connect you and people with disabilities in research and user testing to meet your compliance goals.
- Browser extensions: axe is a recommended extension for Chrome, Firefox, Edge that help identify and resolve common accessibility issues.
The accessibility engine of axe is open-source and it can be used in different ways, as this post will show.
Before we start
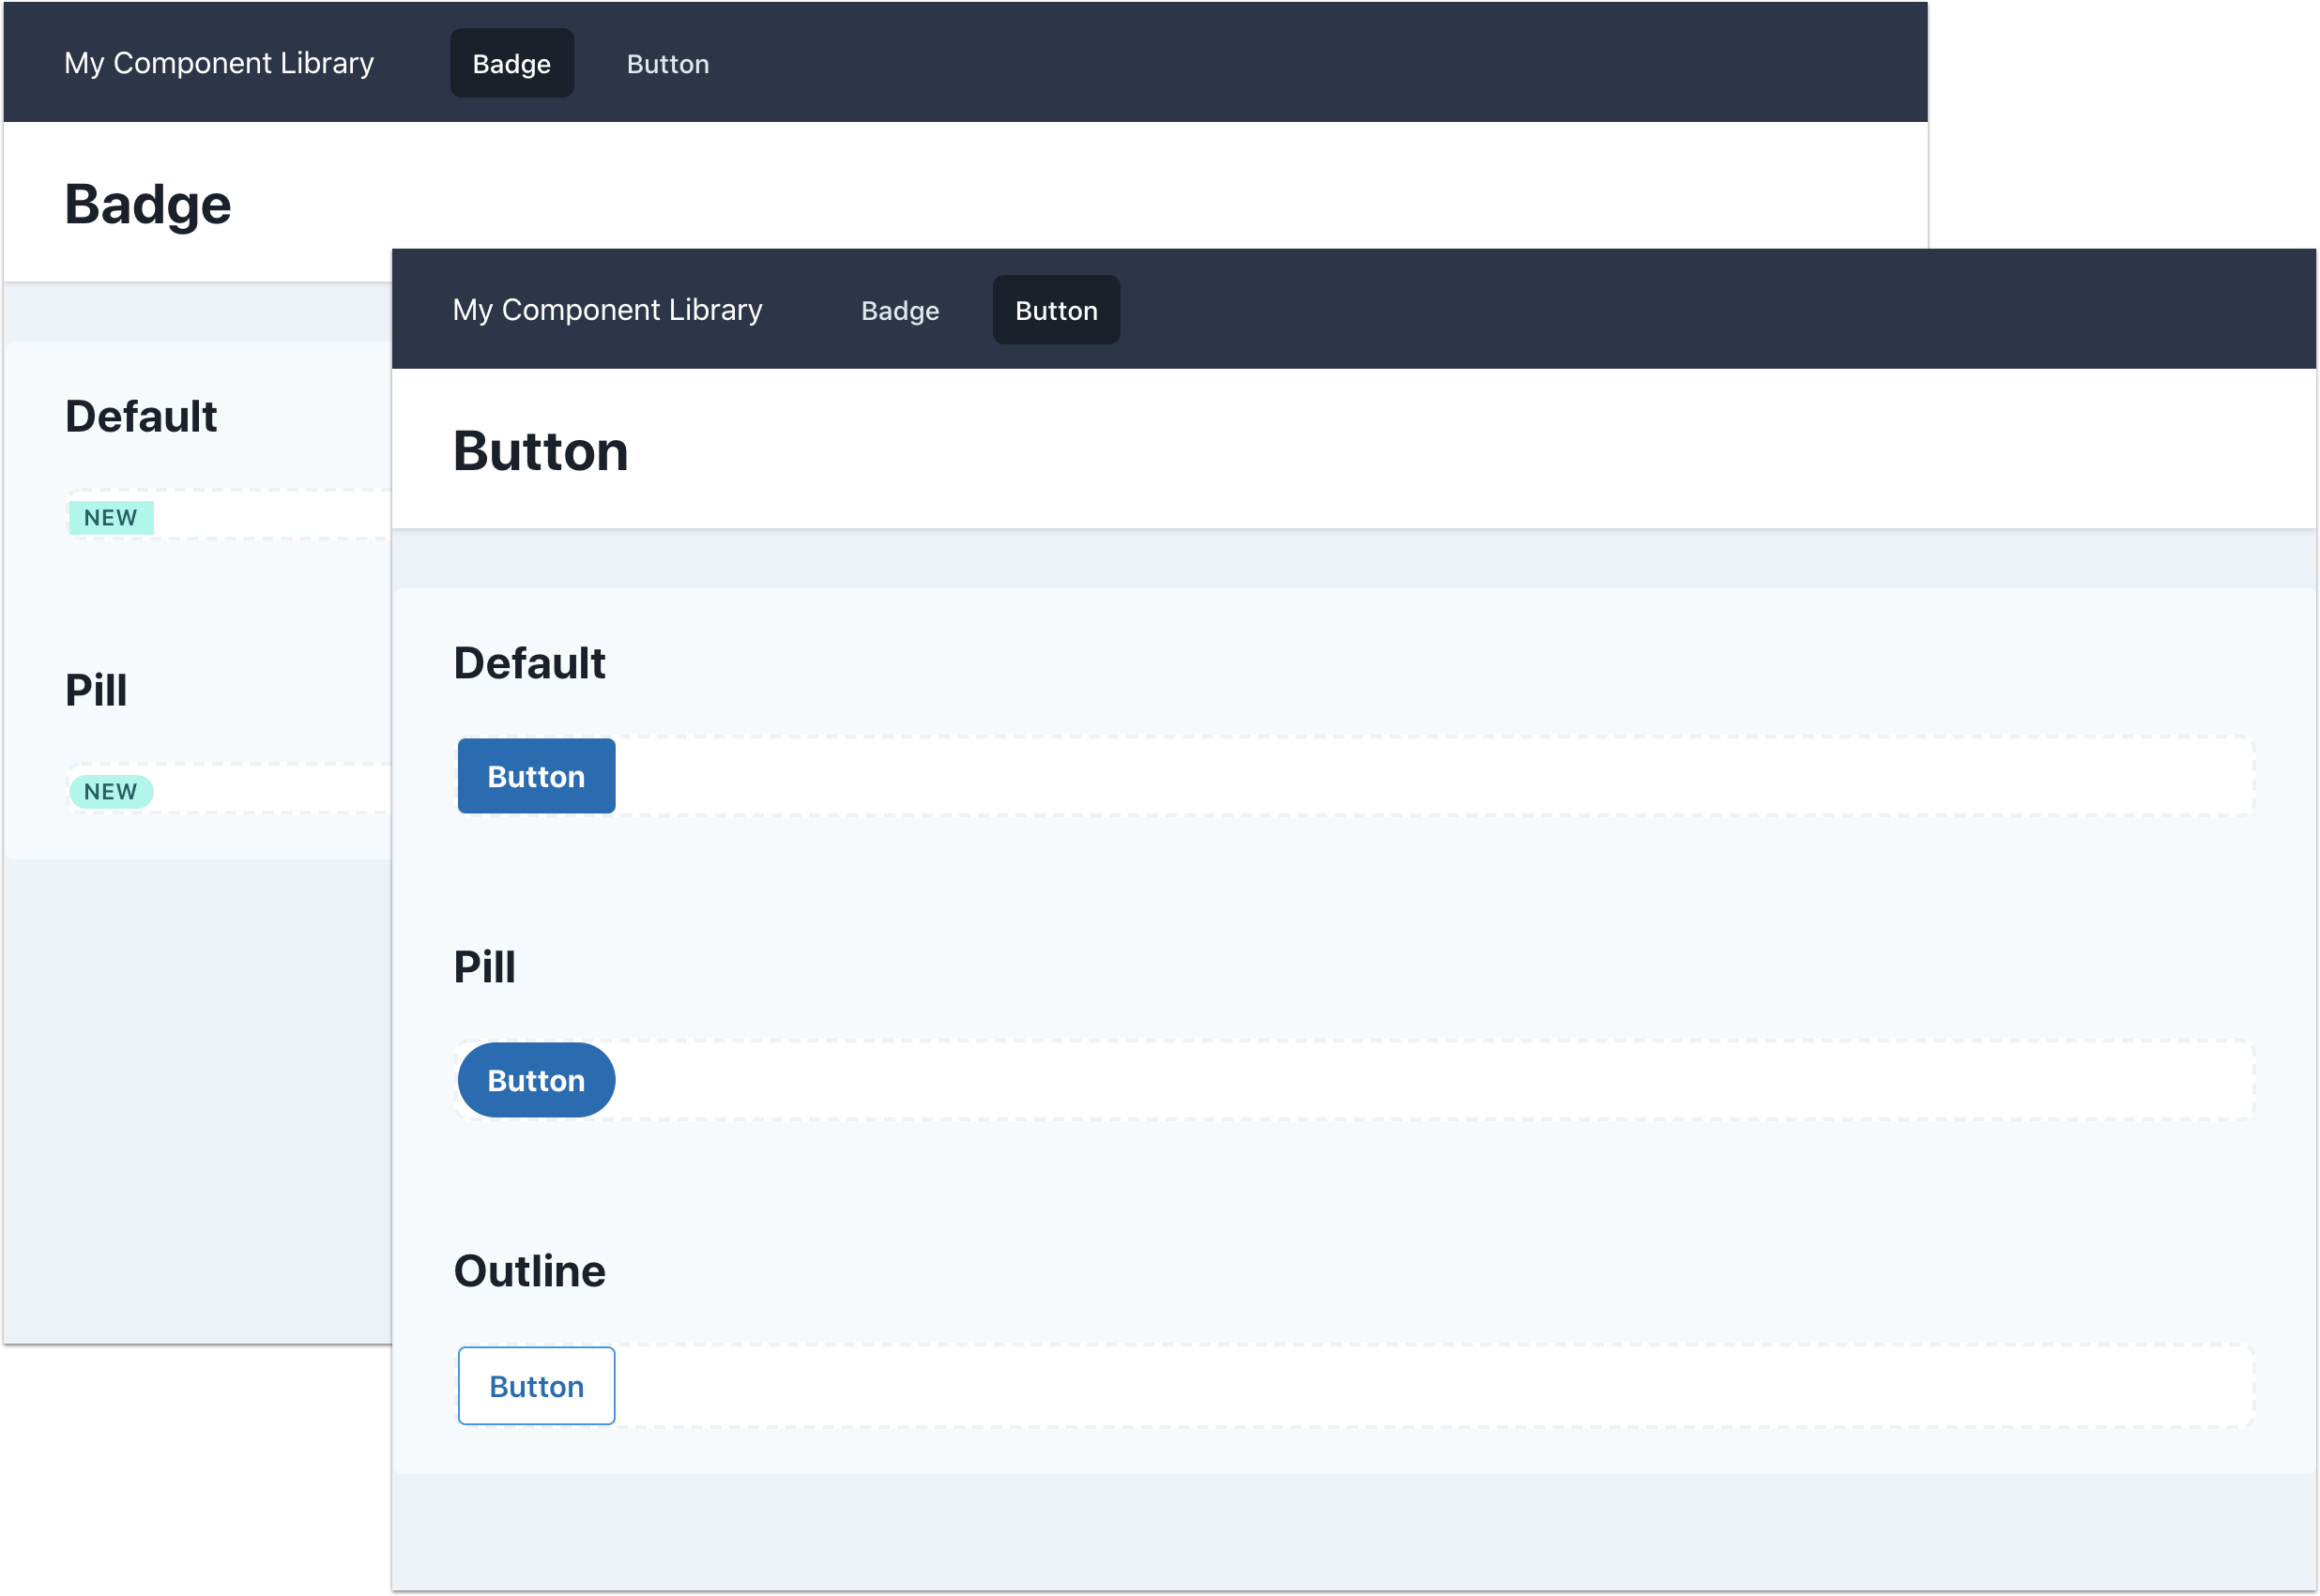
I created a sample website ↗︎ to mimic a Component Library. It is a very simple website created with Tailwind CSS and hosted in Vercel and it documents 2 components: badge ↗︎ and button ↗︎.
You can check the source code in GitHub. The website is static and it is inside the public folder. You can see the website locally by running npm run serve and checking in the browser http://localhost:8000.
Adding Cypress and cypress-axe
Start by cloning the example repository. Next, create a new branch and install cypress-axe, the package responsible for tieing the axe engine to Cypress.
git checkout -b add-cypress
npm install -D cypress cypress-axe
Next, create a cypress/support/index.js file containing:
import 'cypress-axe'This import will inject all the functions needed for tests.
Creating the accessibility test
Time to create the accessibility test. Here is the plan:
- Cypress will visit each page (badge and button) of the project.
- Cypress will test each example in the page. The Badge page has 2 examples (Default and Pill), while the Button page has 3 examples (Default, Pill and Outline). All these examples are inside an
<div>element with acypress-wrapper. This class was added with the only intention to identify what needs to be tested.
The first step is creating Cypress configuration file (cypress.json):
{
  "baseUrl": "http://localhost:8000/",
  "video": false
}
The baseUrl is the website running locally. As I mentioned before, npm run serve will serve the content of the public folder. The second option, video disables Cypress video recording, which won't be used in the project.
Time to create the test. In cypress/integration/accessibility.spec.js, add:
const routes = ['badge.html', 'button.html'];

describe('Component accessibility test', () => {
  routes.forEach((route) => {
    const componentName = route.replace('.html', '');
    const testName = `${componentName} has no detectable accessibility violations on load`;

    it(testName, () => {
      cy.visit(route);
      cy.injectAxe();

      cy.get('.cypress-wrapper').each((element, index) => {
        cy.checkA11y(
          '.cypress-wrapper',
          {
            runOnly: {
              type: 'tag',
              values: ['wcag2a'],
            },
          }
        );
      });
    });
  });
});
In the code above, I am creating dynamically tests based in the routes array. The test will check each .cypress-wrapper element against WCAG 2.0 Level A rules. There are different standards / purposes, as the table above shows:
| Tag Name | Accessibility Standard / Purpose |
|---|---|
wcag2a | WCAG 2.0 Level A |
wcag2aa | WCAG 2.0 Level AA |
wcag21a | WCAG 2.1 Level A |
wcag21aa | WCAG 2.1 Level AA |
best-practice | Common accessibility best practices |
wcag*** | WCAG success criterion e.g. wcag111 maps to SC 1.1.1 |
ACT | W3C approved Accessibility Conformance Testing rules |
section508 | Old Section 508 rules |
section508.*.* | Requirement in old Section 508 |
You can find more information about it in the axe-core docs.
Last, let's create inside the package.json the command to trigger the tests:
{
  "test": "cypress"
}
From here, there are 2 options: run Cypress in headless mode with npm run cypress run or use the Cypress Test Runner with npm run cypress open.
Headless option
Using npm run test run, the output should be similar to the next image:
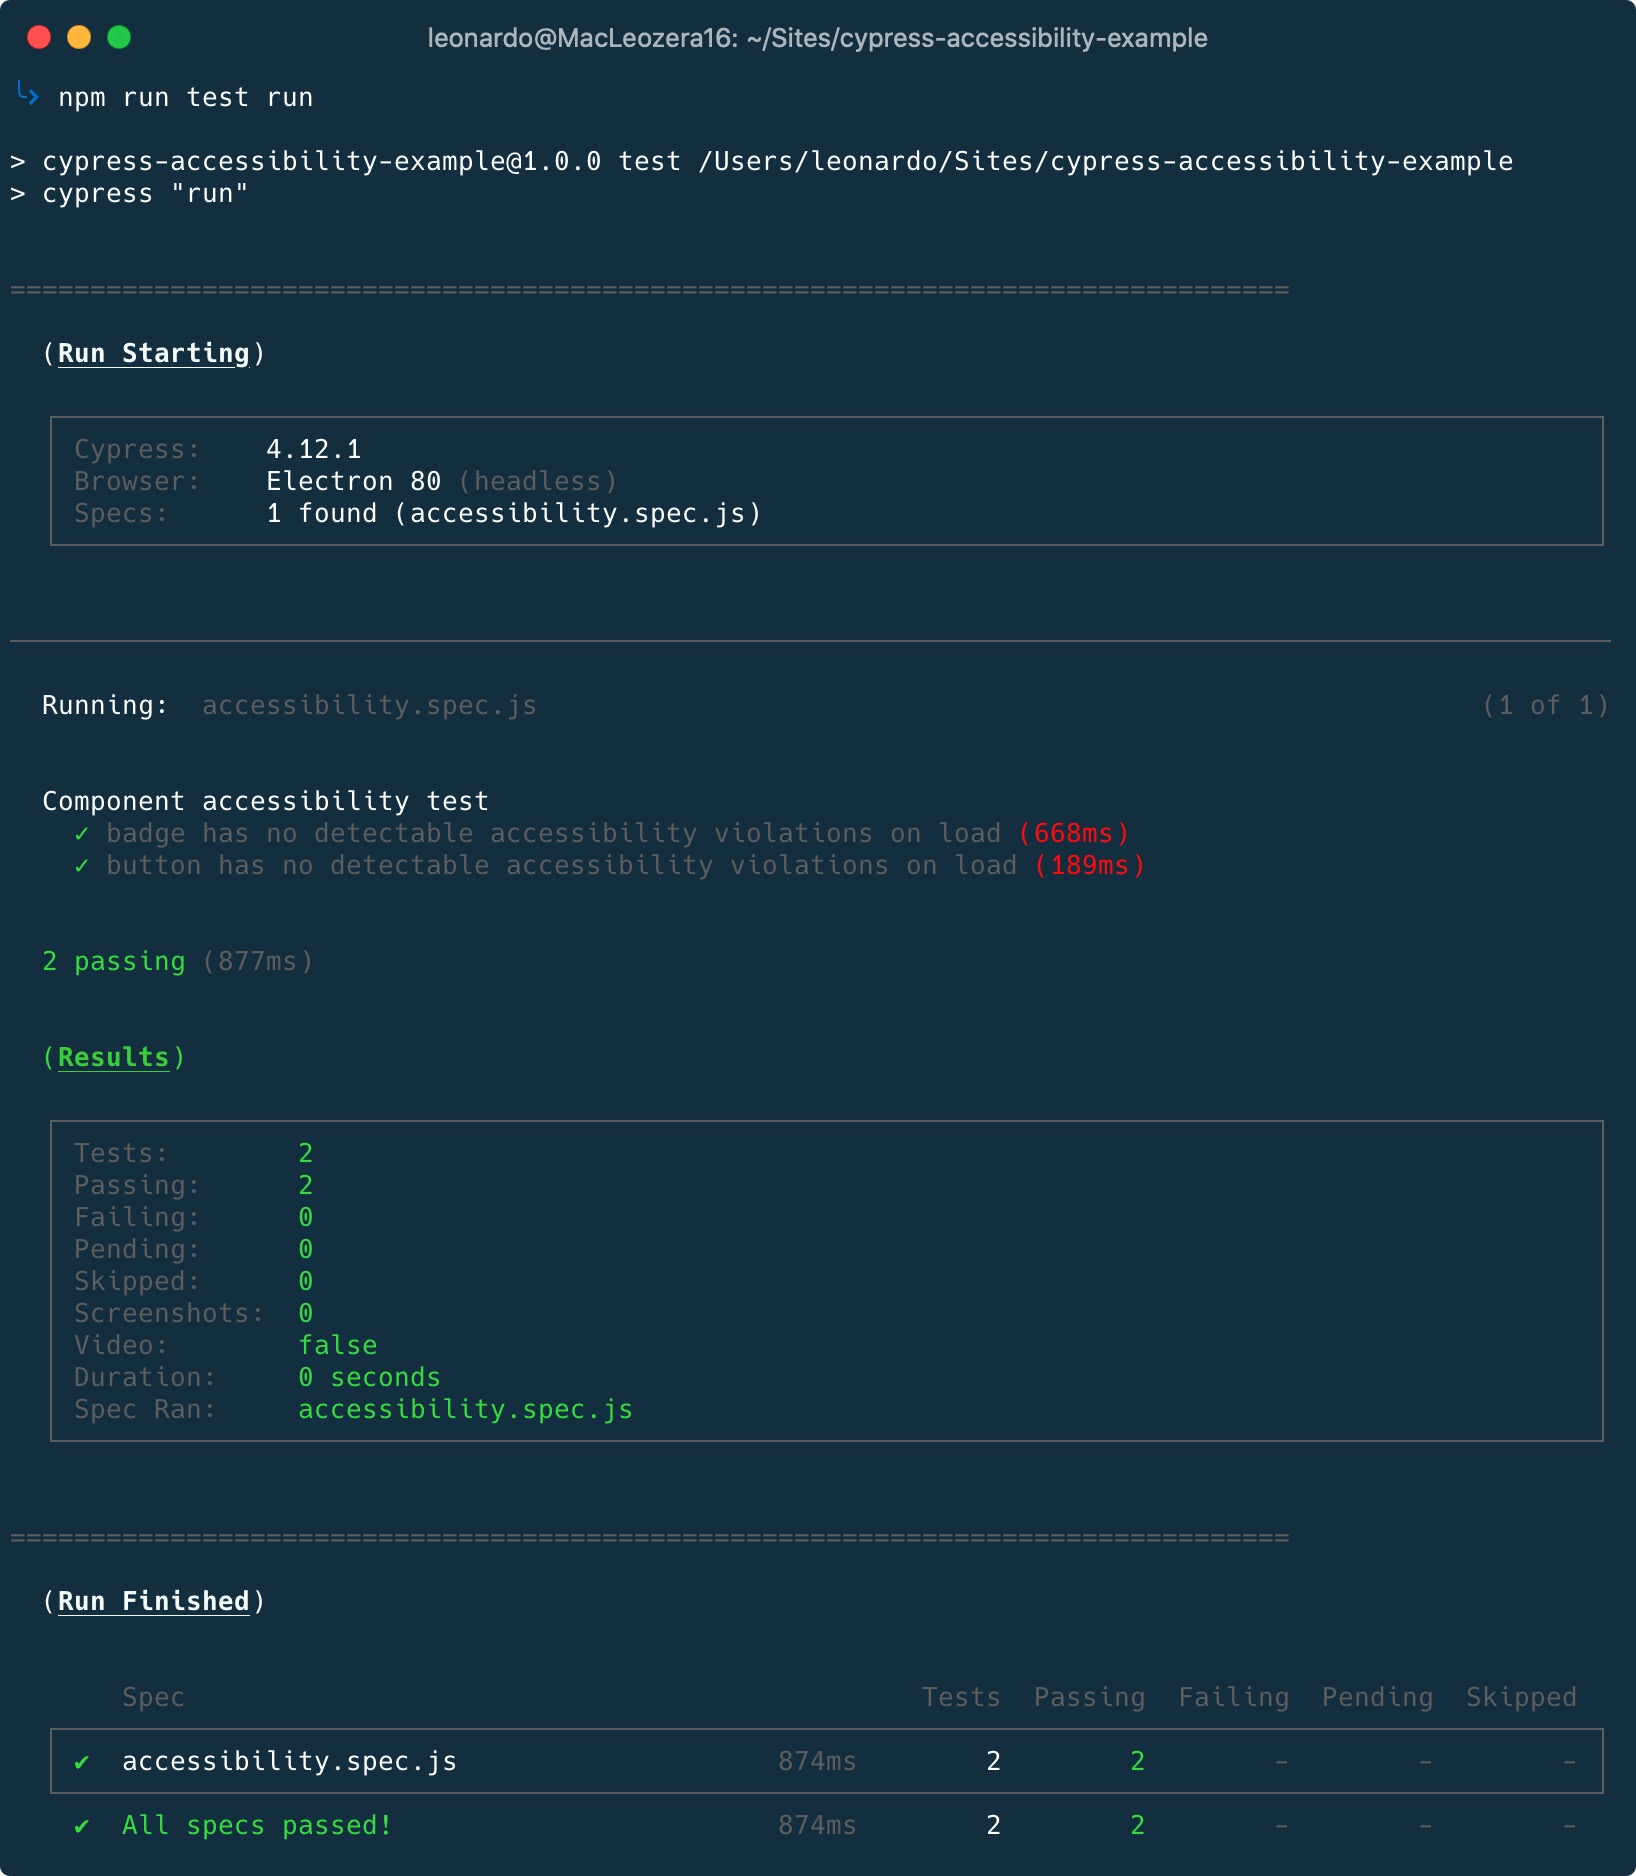
The tests will pass since the components have no accessibility issues.
Test Runner option
Using npm run test open, Cypress Test Runner will be opened and you can follow step by step the tests.
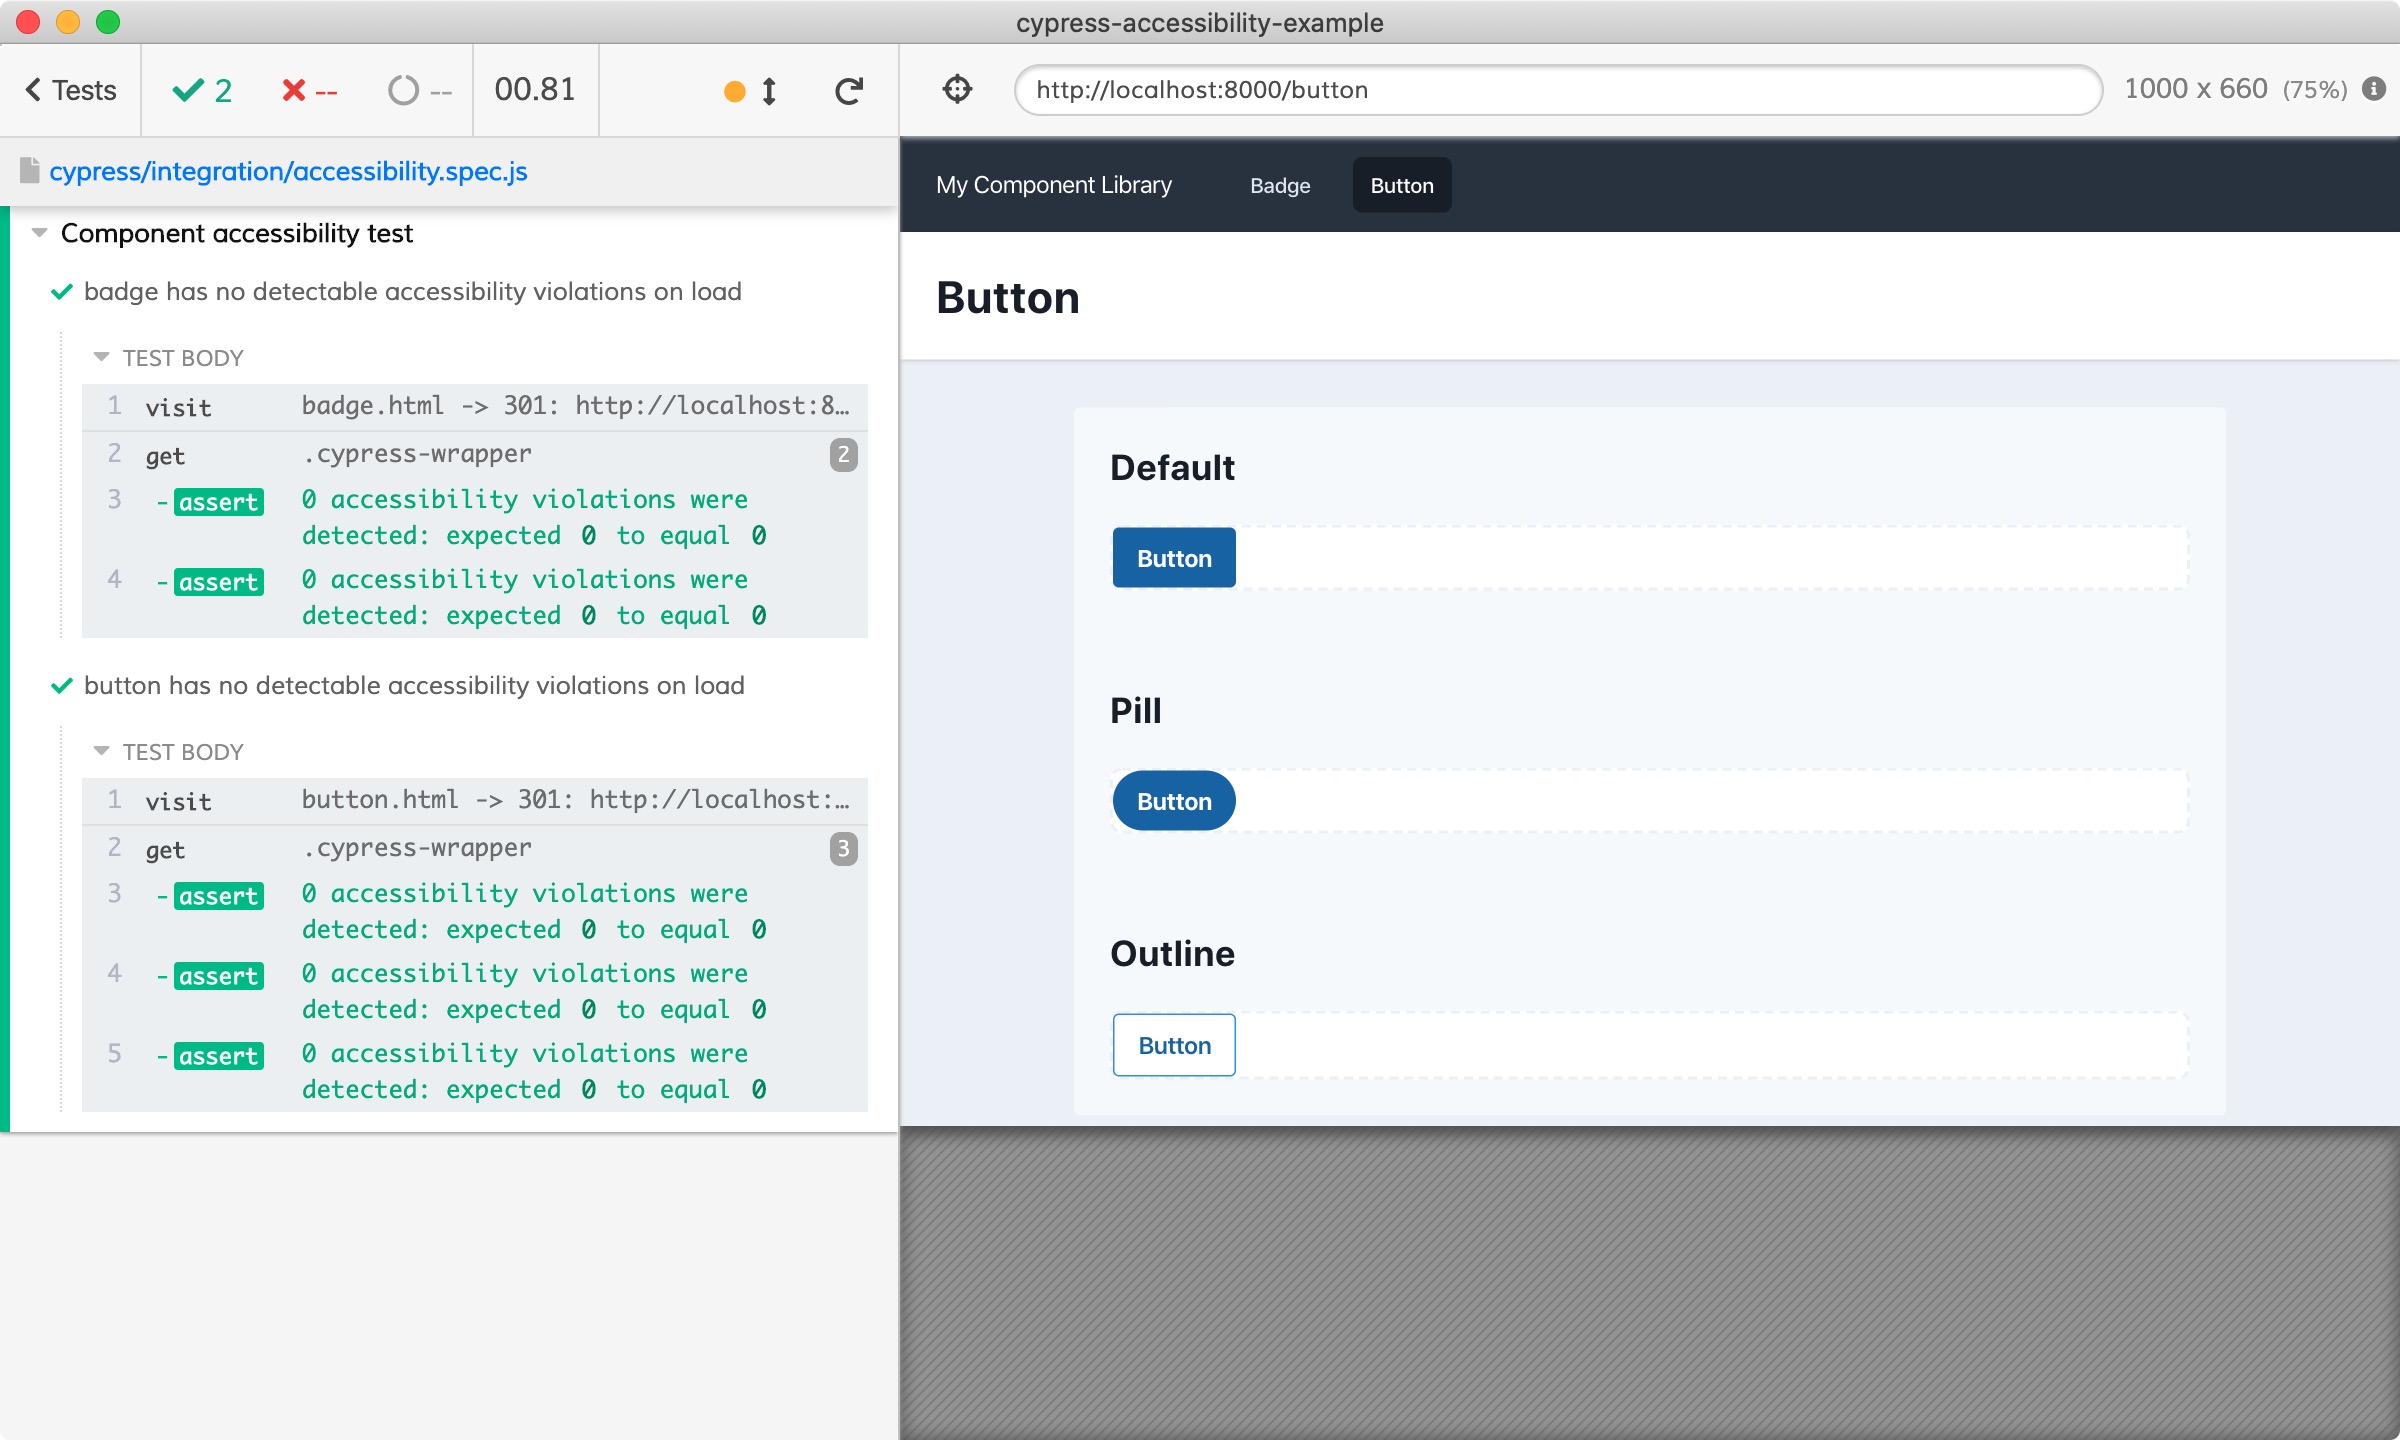
Our first milestone is done, let's merge this branch to master. If you want to see the work done so far, jump in my Pull Request.
Testing in real life
Imagine we are updating the website and we want to identify the buttons with ids. The id property must be unique in the document, we can't have 2 elements with the same one, however, we forgot about that and 3 buttons have the same id.
Cypress will fail and the output will look something like this:
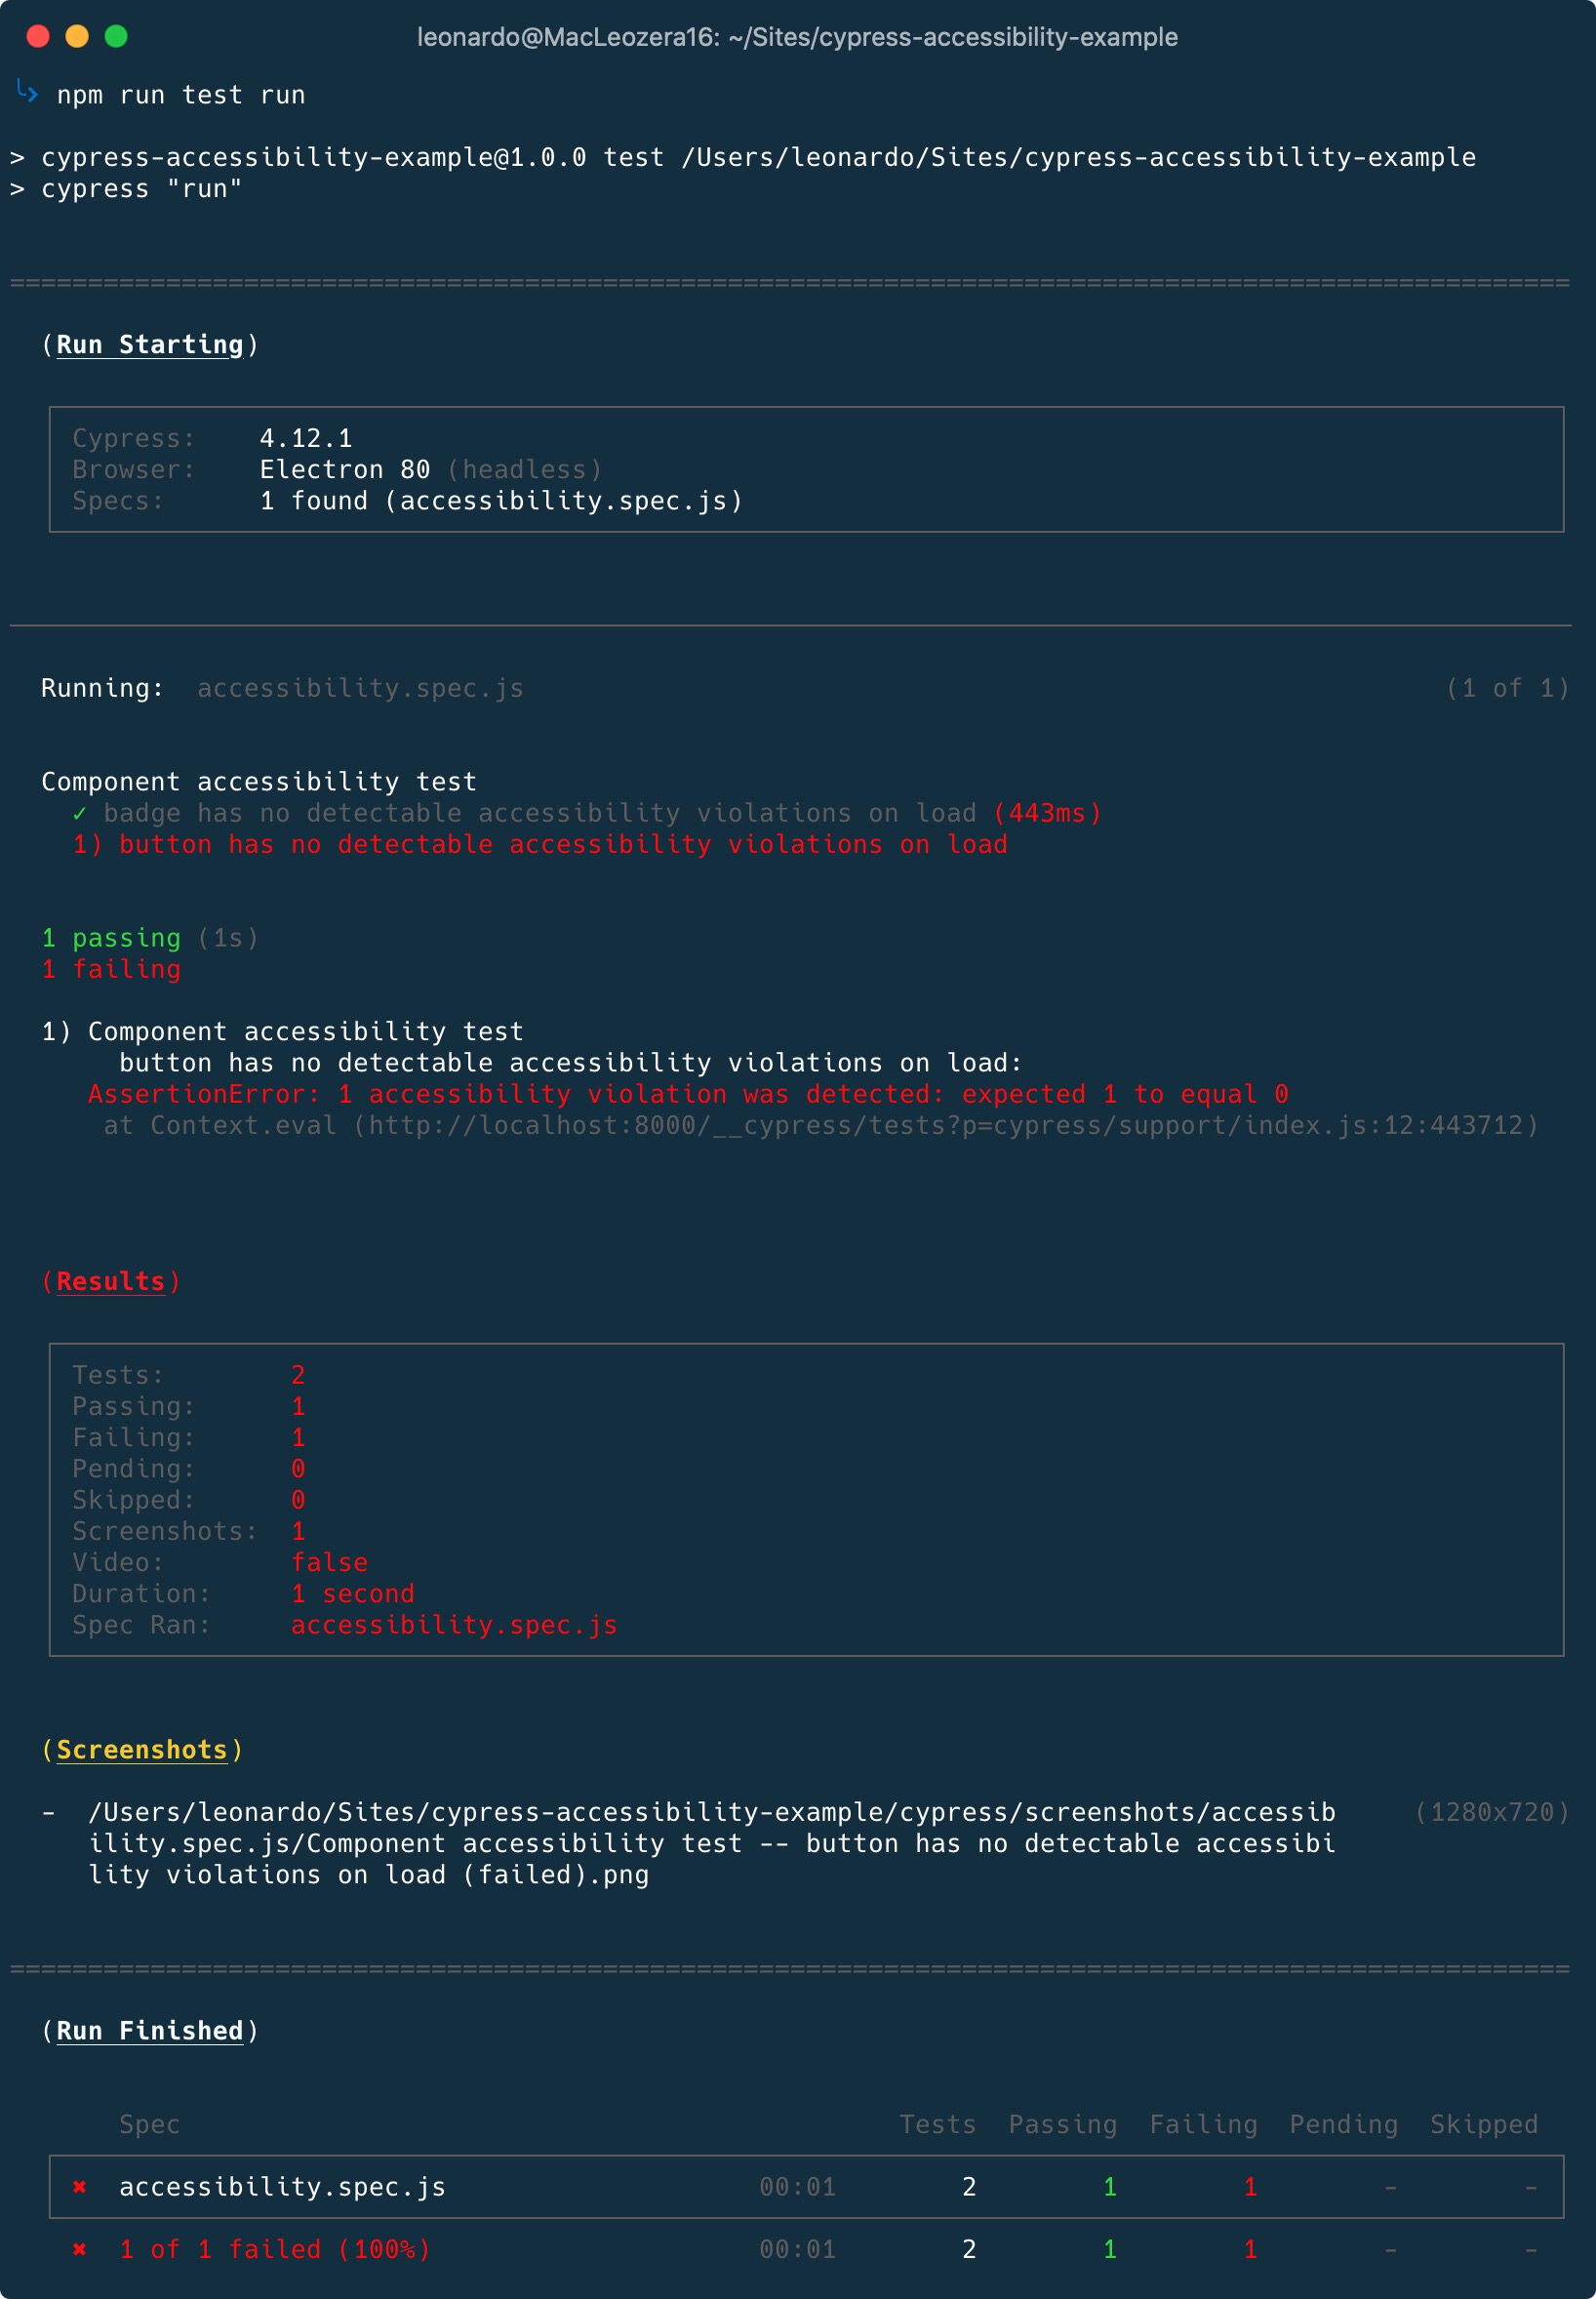
Let's improve the output of our tests by showing a table of found issues. First, let's create a new branch:
git checkout -b improve-cypress-testsNext, create the cypress/plugins/index.js file with the following content:
module.exports = (on, config) => {
  on('task', {
    log(message) {
      console.log(message)

      return null
    },
    table(message) {
      console.table(message)

      return null
    }
  })
}
This will execute code in Node via the task plugin event of Cypress. Next, let's go back to the accessibility.spec.js file and add the following function in the top of the file:
const terminalLog = (violations) => {
  cy.task(
    'log',
    `${violations.length} accessibility violation${
      violations.length === 1 ? '' : 's'
    } ${violations.length === 1 ? 'was' : 'were'} detected`
  )
  // pluck specific keys to keep the table readable
  const violationData = violations.map(
    ({ id, impact, description, nodes }) => ({
      id,
      impact,
      description,
      nodes: nodes.length
    })
  )

  cy.task('table', violationData)
}
The violations array contains all information about the failing elements. You can tweak this code to include, for instance, the element source code in the test output.
Last, lets call the function inside the tests. Modify the checkA11y function to:
cy.checkA11y(
  '.cypress-wrapper',
  {
    runOnly: {
      type: 'tag',
      values: ['wcag2a'],
    },
  },
  terminalLog,
);
When you run the test again, you'll a table containing the issues reported by axe:
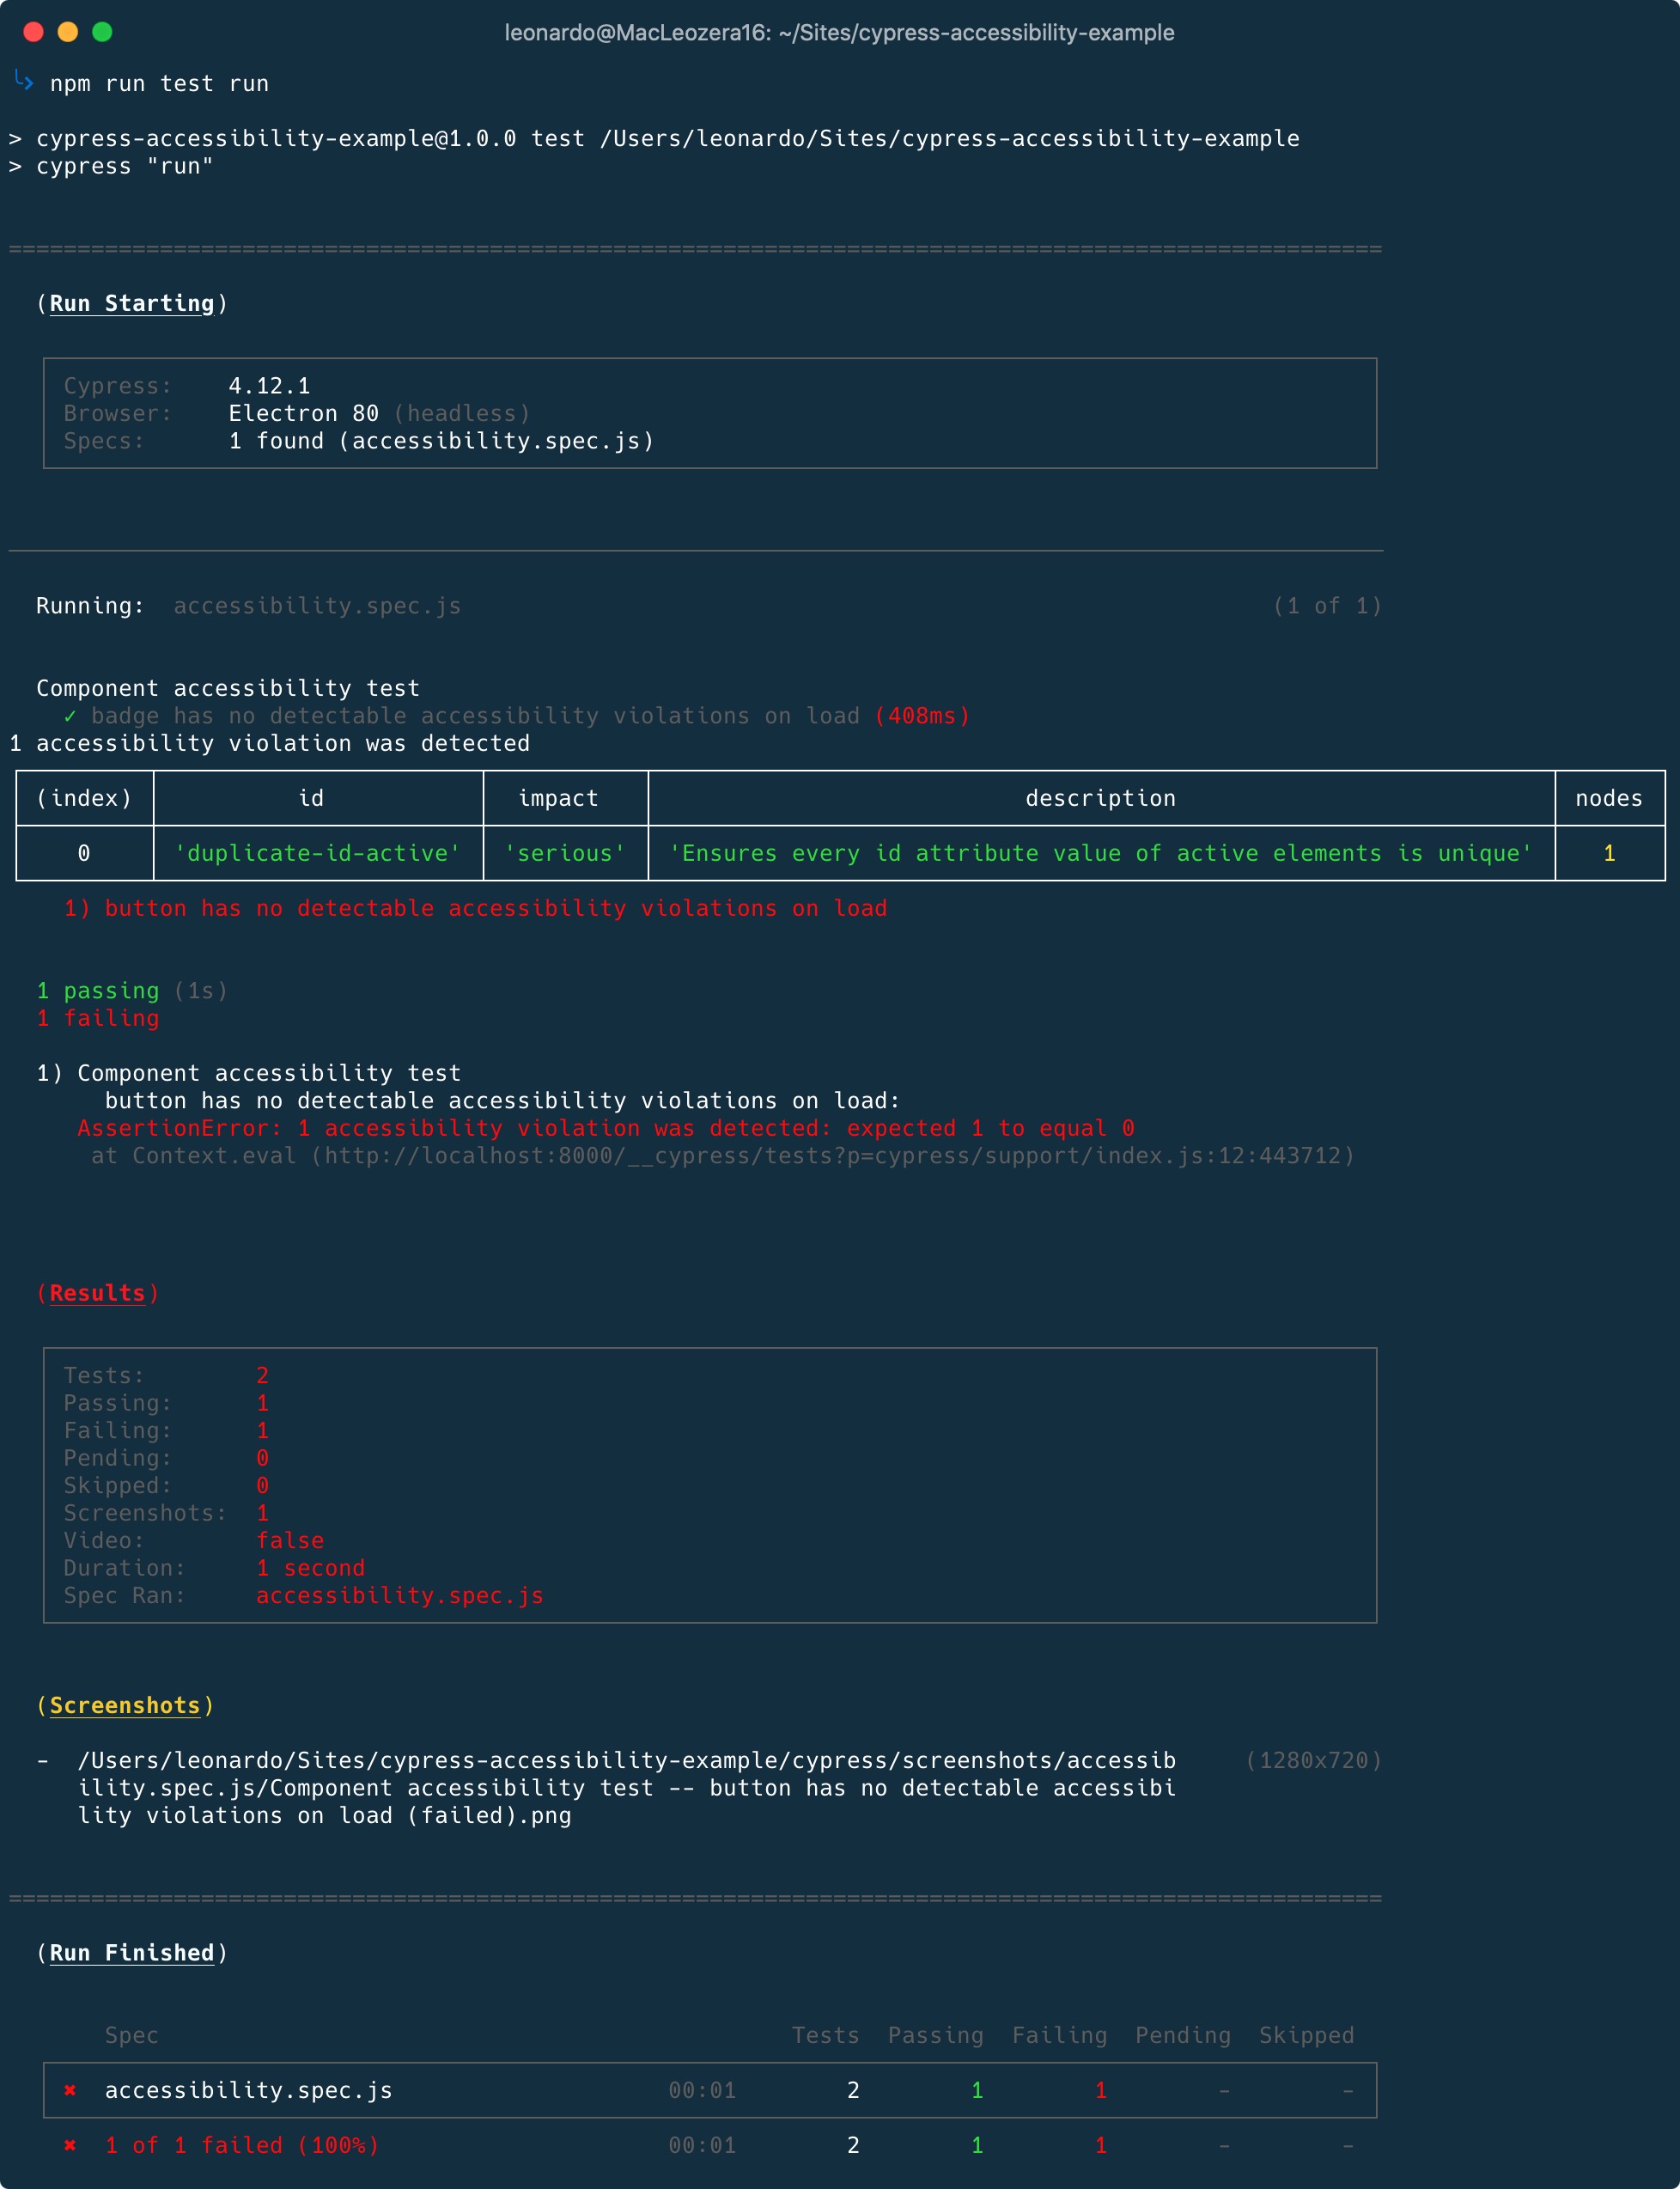
If you have any questions, please check the Pull request in Github.
Next steps
From here, you can continue your journey making products more accessible. As next steps, I would recommend:
- Adding these tests in your CI solution - I wrote about integrating Cypress inside Semaphore before;
- Finding the best way to customize the output of tests to improve troubleshooting issues;
- Learning more about how axe works.
I hope that you have learned that accessibility testing is not difficult and it doesn't require much to start. Automation powered by axe can definitely help us to create better user experiences to all people.
